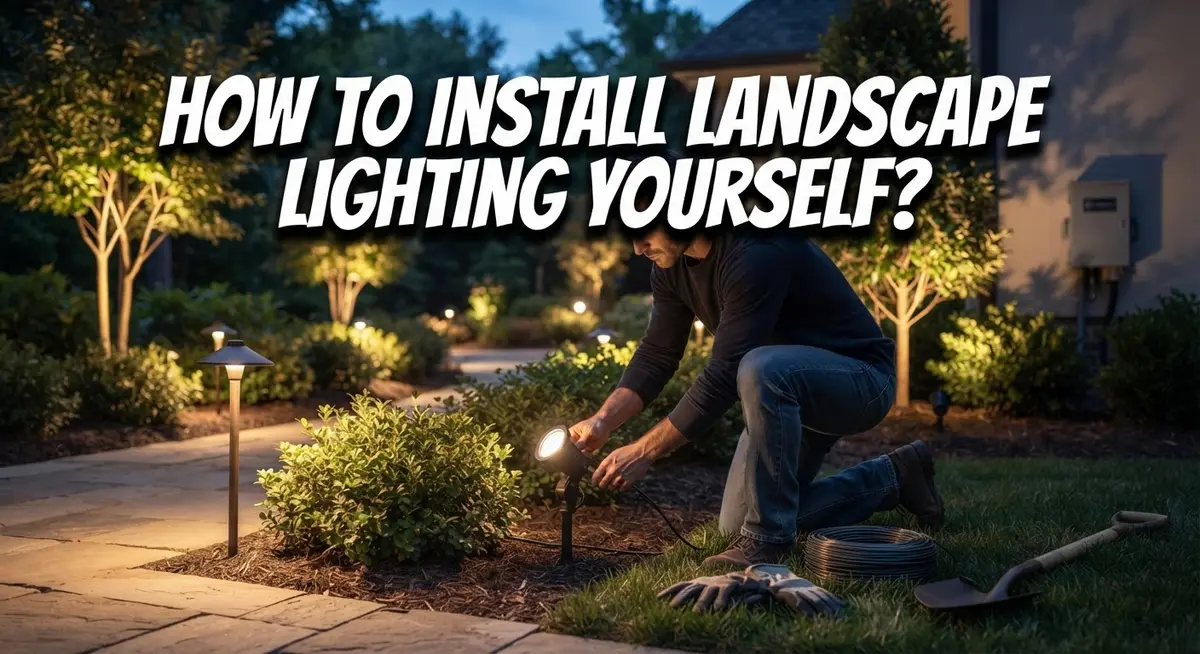
How to Install Landscape Lighting Yourself?
Landscape lighting can transform your yard into a beautiful space. It adds charm to your home at night. It also boosts safety along walkways and steps.
The good news? You don’t need to hire an electrician. Most landscape lighting kits use a low voltage system. This makes them safer and simpler for any homeowner to install.
This guide walks you through the entire process. You will learn how to plan your layout first. This step helps you avoid hitting cables or irrigation lines.
We will cover mounting your transformer correctly. You will also learn how to connect fixtures to the cable. Proper burying techniques keep your yard looking neat and tidy.
Placement matters just as much as installation. We share tips on spacing lights along pathways. You will also discover common mistakes to avoid during setup.
Finally, we discuss simple maintenance tips. These tricks keep your lights shining bright for years. Let’s get your outdoor space glowing tonight.
In a Nutshell
Here’s a quick recap to keep in mind as you plan your project:
-
Choose a low voltage system. It’s safer and simpler for DIY work. You won’t need an electrician for this task.
-
Plan your layout first. Mark existing cables and irrigation lines before you dig. This step prevents costly damage later.
-
Keep fixtures close to pathways. Position lights no more than 6 inches from the edge. A tape measure helps keep spacing even.
-
Connect wires carefully. Loose or improper connections cause many lighting failures. Double check each link before burying your cable.
-
Trim plants near your fixtures. Overgrown greenery blocks light and hides fixtures. Regular trimming keeps your display looking sharp.
-
Adjust your timer each season. Daylight saving time shifts can throw off your schedule. A quick reset keeps your lights on track.
Follow these basics, and your landscape lighting project will run smoothly from start to finish.
Understanding Low-Voltage Landscape Lighting Systems
Low-voltage landscape lighting systems work differently from standard household electrical setups. These systems operate at 12 volts instead of 120 volts, making them much safer for outdoor use and easier to install yourself.
Every low-voltage system has three essential components. The transformer converts your home’s regular electricity into low-voltage power. The fixtures are the lights you see in your yard. The cable connects everything together and carries the low-voltage power underground.
The transformer is your system’s brain. It sits near an outdoor outlet on your house or garage. You plug it into a standard outlet, and it immediately reduces the electrical current to a safe level. This is why you can work with these systems without special electrical training.
Low-voltage cable runs from your transformer to each fixture. This cable sits just below your soil surface, so you don’t need deep trenches. The shallow depth makes digging safer and faster than traditional electrical installations.
Fixtures come in many styles and shapes. Some sit on stakes you push into the ground. Others mount on walls or nestle into flower beds. Path lights stand upright along walkways. Spotlights angle toward trees or architectural features. Deck lights mount flat on railings or steps.
The beauty of this system is its flexibility. You can add more fixtures later by extending your cable. You can move lights around if your landscaping changes. You can even adjust brightness on many models.
Safety is a major advantage. Low voltage means you won’t get a serious shock if you accidentally cut the cable while digging. The system simply stops working instead of creating a hazard.
Most systems include a timer. This lets your lights turn on and off automatically. You set it once, and your yard lights up every evening without you doing anything.
Understanding these basics prepares you for the actual installation work ahead.
Planning Your Layout and Locating Underground Utilities
Before you dig a single hole, you need to know exactly where underground utilities run through your yard. This step prevents expensive damage and keeps you safe.
Start by calling your local utility locating service. Most areas have a free “call before you dig” program. You phone them, and they send a technician to mark underground cables, gas lines, and water pipes with spray paint or flags. This takes just a few days. Do not skip this step. Hitting a power line or gas line creates serious hazards.
While waiting for the utility locator, walk your yard and mark existing irrigation lines yourself. Look for valve boxes or sprinkler heads. Use stakes or flags to indicate where these lines run. Take photos of your yard from multiple angles. This helps you remember the layout later.
Next, sketch your lighting plan on paper. Draw your house, pathways, trees, and flower beds. Mark where you want each light fixture. Use a tape measure for consistent spacing. Most fixtures work best when positioned no more than 6 inches from pathway edges. This placement lights the walkway safely without creating harsh shadows.
Think about how water flows during rain. Avoid placing fixtures in low spots where water pools. Soggy soil makes installation harder and can damage equipment over time.
Mark your planned fixture locations with stakes in your actual yard. Walk the path at dusk to visualize how the lights will look. Adjust positions if needed. This takes extra time now but saves frustration during installation.
Finally, identify the best spot for your transformer. It should be near an outdoor electrical outlet and close to where most of your cable will run. A garage wall, shed, or covered patio works well. Mark this location clearly.
With utilities located and your layout planned, you’re ready to move forward with confidence.
Step-by-Step Installation Process
Now that you’ve planned your layout and located underground utilities, you’re ready to start the actual installation process. This section walks you through each step in order.
Mount your transformer first. Find a spot near an outdoor electrical outlet. The transformer should sit on a dry surface like a wall or post. Secure it firmly so it won’t move or tip over. Make sure it’s easily accessible for future adjustments.
Connect your fixtures to the cable next. Most low voltage systems use simple connector clips. Strip a small section of insulation from the cable end. Insert the wire into the connector and tighten it by hand. Check that each connection feels snug and secure.
Lay out your cable pathway. Start from the transformer and run cable toward your first fixture location. Follow your marked stakes and planned route. Keep the cable visible on the surface for now. You’ll bury it after all connections are complete.
Position each fixture along the cable. Push stake mounted fixtures into the ground at your marked spots. Make sure lights sit 6 inches from pathway edges for proper illumination. Space fixtures evenly for balanced lighting across your yard.
Bury the cable carefully. Use a flat shovel to cut a shallow trench about 4 to 6 inches deep. Lay the cable in the trench. Cover it with soil. Avoid sharp bends or kinks that could damage the wire.
Test everything before finishing. Plug the transformer into the outdoor outlet. All fixtures should light up. Walk around and check brightness levels. Adjust fixture angles if needed.
Set your timer last. Most transformers have built in timers. Program it for your preferred on and off times. Now your system is ready to illuminate your landscape automatically every evening.
Placement Guidelines for Pathways and Garden Beds
When placing lights along pathways, keep them close to the edges. Position each fixture no more than 6 inches away from the pathway border. This distance ensures even light coverage across the walking surface without creating dark spots.
Use a tape measure to maintain consistent spacing between fixtures. Mark each spot with a small stake or flag before installation. Consistent spacing looks professional and provides uniform illumination for safety.
For garden beds, think about what you want to highlight. Do you want to silhouette plants or illuminate them from above? Position lights to showcase your garden’s best features without creating harsh shadows.
Angle matters significantly when placing fixtures near beds. Aim lights upward and outward to wash the foliage with gentle illumination. Avoid pointing lights directly at plant stems, as this creates an unnatural appearance.
Consider the mature size of your plants. A young shrub might need repositioning once it grows. Place lights slightly back from where plants will eventually reach their full height.
For pathway lighting specifically, alternate fixtures on opposite sides of the walkway. This creates a balanced appearance and reduces shadows across the path. If your pathway is narrow, you might place lights on just one side.
Avoid placing fixtures directly under trees or dense shrubs. Overhanging branches block light and create dead zones. Position lights at the perimeter of tree canopies instead.
Think about water drainage patterns. Never place fixtures in low spots where water pools after rain. Wet soil around fixtures can cause connection problems and safety issues.
Space fixtures closer together in areas with more foot traffic or where safety is critical. Wider spacing works fine in decorative garden sections with less activity.
Step back and view your layout from different angles. Walk the pathway at different times to see how light falls. Make adjustments before you bury the cable permanently.
Common Mistakes to Avoid During Installation
Installing landscape lighting yourself is rewarding, but mistakes can waste time and money. Understanding what to avoid makes your project smoother and safer.
The biggest mistake homeowners make is damaging existing underground utilities. Even after calling your utility locator service, stay alert while digging. A severed water line or electrical cable creates expensive problems. Dig slowly and carefully along your marked cable pathway. Stop immediately if you hit anything unexpected.
Improper wire connections cause flickering lights and system failures. Low voltage connectors must sit flush and secure. Push clips firmly until you hear a click. Loose connections allow moisture inside, leading to corrosion. Check each connection twice before burying cable.
Overgrown vegetation around fixtures creates serious issues. Plants grow throughout the season and block light output. Dense foliage also traps moisture against wires and connections. Trim back plants around each fixture regularly. This simple maintenance prevents 80 percent of lighting problems.
Many people forget to adjust timers when daylight saving time arrives. Your lights turn on at the wrong times, wasting energy. Mark your calendar to update timer settings twice yearly. Spring forward and fall back apply to your outdoor lighting too.
Spacing mistakes reduce your lighting effectiveness. Fixtures placed too far apart leave dark gaps along pathways. Fixtures too close together create bright spots and shadows. Use your tape measure and stick to your original spacing plan.
Finally, avoid running cable through areas where you’ll dig later. If you plant new trees or install irrigation next year, you might hit your lighting cable. Keep a simple map of your cable routes for future reference.
Take your time during installation. Rushing leads to most mistakes. Work methodically through each step, and your landscape lighting will perform beautifully for years.
Seasonal Maintenance and Timer Adjustments
Your landscape lighting system needs regular care to keep it working well. Seasonal maintenance ensures your lights stay bright and functional year after year.
Start by checking all wire connections every few months. Look for loose clips or corroded terminals where the cable meets fixtures. Tighten any connections you find. Corrosion happens naturally outdoors, so inspect connection points before winter and spring.
Trim vegetation around your fixtures regularly. Plants grow quickly and block light output without you realizing it. Walk your yard monthly during growing season and cut back branches or leaves covering any fixtures. This simple step prevents dim spots in your landscape.
Timer adjustments matter more than most people think. Your system’s timer controls when lights turn on and off. Daylight saving time changes twice yearly, and your timer won’t adjust automatically. Update it manually in spring when clocks move forward and again in fall when they move back. This prevents your lights from turning on too early or staying on too late.
Check for water pooling around buried cable areas. Poor drainage can damage connections over time. If you notice standing water, consider redirecting drainage or raising fixtures slightly.
Inspect fixture lenses and covers for dirt or debris. Dust buildup reduces light output significantly. Wipe lenses clean with a soft cloth during seasonal maintenance. Replace any cracked or damaged covers immediately.
Test your entire system monthly. Turn it on manually and walk your yard to confirm all fixtures work. Replace any burned out bulbs right away. Note which areas seem dimmer than before, as this signals connection problems or vegetation overgrowth.
Keep maintenance records in a notebook or phone app. Write down what you checked, when you trimmed plants, and any issues you found. This helps you spot patterns and schedule maintenance before problems develop.
Troubleshooting Common Landscape Lighting Issues
When your landscape lighting stops working properly, you can fix most issues yourself. Start by checking the power source first. Make sure your transformer is plugged in and receiving electricity. Look for a reset button on the transformer and press it if the system won’t turn on.
Next, inspect all visible wire connections. Loose connections cause flickering lights and complete outages. Push connectors firmly together and check for corrosion on metal terminals. Green or white buildup means corrosion is present. Gently clean corroded connections with a dry cloth.
Test individual fixtures to find problem areas. Unplug one fixture at a time and see if others work. A single broken fixture won’t stop your entire system. Replace any fixture that doesn’t light up.
Check your cable pathway for damage. Dig up small sections where you buried the wire and look for cuts or breaks. Animals, lawn equipment, or frost heaving can damage cables underground. Repair damaged sections with waterproof connectors made for outdoor use.
Dim or weak lighting usually means dirt buildup. Clean fixture lenses with a soft cloth and mild soap. Remove any debris blocking the light beam from your fixtures.
Verify your timer settings match the current season. After daylight saving time changes, your lights may turn on at the wrong time. Adjust timer settings to match sunrise and sunset in your area.
Check for water pooling around buried cables. Standing water causes electrical problems and corrosion. Improve drainage in those areas by adding gravel or adjusting the ground slope.
If lights flicker constantly, you likely have a loose connection somewhere. Systematically check every connection point along your cable run. Tighten everything firmly and test again.
Most landscape lighting problems have simple solutions. Take time to inspect your system methodically. You’ll find and fix the issue without calling a professional.
Final Thoughts
Installing landscape lighting yourself is a smart project. You save money and gain a skill you can use for years. The low voltage system makes this task safe for most homeowners.
Start with a clear plan before you buy anything. Map out your yard and mark where cables and irrigation lines already exist. This simple step prevents costly damage later.
Remember the core installation steps. Mount your transformer, connect fixtures to the cable, bury everything properly, and plug in your system. Each step builds on the last one.
Placement matters more than many people realize. Keep lights within six inches of pathway edges for the best effect. Use a tape measure to keep spacing even throughout your yard.
Your success depends on patience and attention to detail. Rushing through steps creates problems you will fix later. Take breaks and check your work as you go.
Maintenance keeps your system working well for years. Check wire connections regularly and trim plants around fixtures. Update your timer settings when seasons change.
Small efforts now prevent bigger headaches down the road. A few minutes of monthly maintenance saves hours of troubleshooting later. Your lighting system rewards consistent care.
Landscape lighting adds beauty and safety to your property. It highlights your home’s best features after dark. It also helps guests navigate walkways safely at night.
This project is within reach for most homeowners. You do not need special training or expensive tools. Basic skills and careful planning get the job done right.
Take pride in your finished project. Every fixture you install teaches you something new. Your yard will look better, and you will feel accomplished.
Start small if you feel unsure. Light one pathway first before tackling your entire yard. Build confidence with each successful connection you make.
Frequently Asked Questions
Can I install landscape lighting without burying cables?
Yes, you have options. Above ground cables work if you run them along pathways or hide them behind plants. However, buried cables look cleaner and protect wires from damage. Burying takes more time but gives your yard a finished appearance.
How deep should I bury the cable?
Bury your cable at least 6 inches underground. This depth protects wires from lawn mowers and foot traffic. Use a flat shovel to create a shallow trench. Lay the cable in the trench, then cover it with soil.
What if I hit an existing utility line while digging?
Always call your local utility locating service before you dig. They mark gas lines, water pipes, and electrical cables for free. This step takes one phone call and prevents serious injury or damage to your home.
Do I need a professional electrician to install the transformer?
No. Low voltage transformers plug into standard outdoor outlets. You do not need an electrician for this task. Just find a dry location near your house and plug it in. Make sure the outlet has a GFCI protection device for safety.
How do I know if my fixtures are spaced correctly?
Use a tape measure to check spacing along pathways. Position lights no more than 6 inches from pathway edges. Space fixtures 8 to 10 feet apart for even coverage. Adjust spacing based on how bright you want your yard.

DK is the founder and lead writer at Smart Lighting Finds, where he helps readers discover the best lighting products through honest, hands-on reviews and in-depth comparisons. With a deep passion for home improvement and smart technology, DK is dedicated to making every lighting decision easier and brighter for his readers.