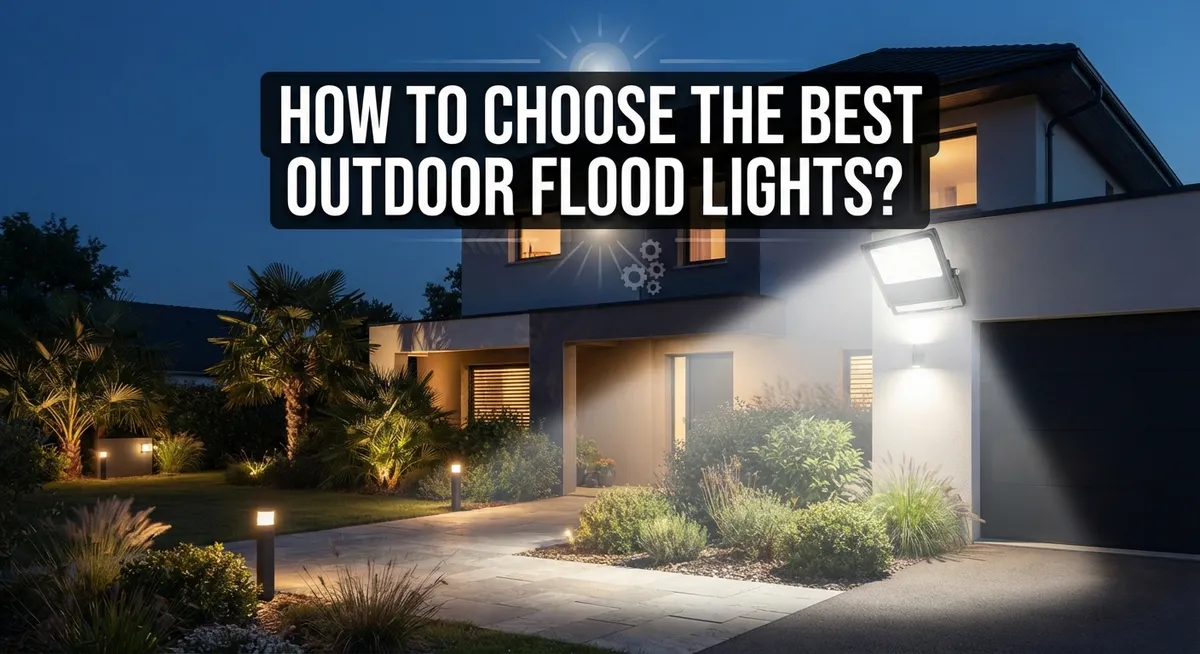
How to Choose the Best Outdoor Flood Lights?
Good outdoor flood lights can transform your home. They boost security and make your yard safer at night.
But picking the right one feels tricky. There are so many specs to check.
Lumen output, beam angle, and IP rating all matter. Color temperature and sensor type play a big role too.
Choose wrong, and you might end up with dim corners or lights that trigger every passing cat. Poor placement or weak weatherproofing can waste your money fast.
This guide breaks it all down for you. We will cover core specs like lumens, beam angle, and voltage.
You will learn about PIR motion sensors and dusk to dawn options. We also explain common mistakes people make during installation.
By the end, you will know how to match flood lights to your space. You will understand mounting height, aiming direction, and wiring basics too.
Whether you want bright security lighting or a softer glow for your backyard, this article helps you decide. Let’s find the best outdoor flood lights for your home.
In a Nutshell
Here’s a quick recap to keep in mind before you buy:
-
Check the lumen output first. Small yards need around 700 lumens. Bigger spaces need up to 5,000 lumens for full coverage.
-
Look at the beam angle. A wide angle between 90° and 120° covers more ground. This works well for driveways and backyards.
-
Pick the right IP rating. An IP65 or higher rating keeps your light safe from rain and dust. This matters most for outdoor use.
-
Match the color temperature to your space. A range of 3000K to 4000K gives a warm, welcoming glow for most backyards.
-
Choose your sensor type wisely. PIR sensors turn on with motion. Dusk to dawn sensors switch on and off automatically each day.
-
Think about mounting height and angle. Wrong placement causes shadows or glare. Proper aiming improves both safety and looks.
Keep these points handy. They help you avoid common buying mistakes and find lights that truly fit your needs.
Understanding Key Flood Light Specifications
Flood light specifications tell you exactly what each light can do. Understanding these numbers helps you pick the right fixture for your space.
Beam angle measures how wide the light spreads. Most outdoor flood lights offer 90 to 120 degrees of coverage. A wider angle works best for large patios or driveways. Narrower angles focus light on specific areas like entryways or garden beds.
Lumen output determines brightness. Think of lumens as the total light a fixture produces. You’ll find outdoor flood lights ranging from 700 to 5,000 lumens. Small accent areas need 700 to 1,500 lumens. Medium sized backyards typically need 2,000 to 3,000 lumens. Large properties or security applications may require 4,000 to 5,000 lumens.
IP rating shows weatherproofing strength. IP65 or higher protects against rain, dust, and moisture. This matters because outdoor lights face constant exposure to the elements. Lower ratings will fail quickly in wet climates.
Color temperature affects the mood and function of your space. Measured in Kelvin, most people prefer 3000K to 4000K for residential areas. Lower temperatures like 3000K create warm, welcoming light. Higher temperatures around 4000K feel cooler and brighter, ideal for security purposes.
Wattage connects to energy use and operating costs. LED flood lights use far less power than older halogen models. Check the wattage to understand your electricity impact over time.
Control options vary widely. Motion sensors turn lights on only when needed. Dusk to dawn sensors automatically activate at sunset. Some lights offer both features. Others allow manual switching or app control.
These specifications work together. A bright 5,000 lumen light with a wide 120 degree beam covers large areas efficiently. A dimmer 1,000 lumen fixture with a narrow angle suits accent lighting. Match the specs to your actual needs, not just the highest numbers available.
Choosing the Right Sensor Type for Your Needs
Sensor types make a big difference in how your flood lights perform. Two main options exist: PIR motion sensors and dusk to dawn automatic controls. Each serves different purposes, so understanding them helps you pick the right fit.
PIR motion sensors detect heat and movement. When someone walks near your light, it turns on instantly. This works great for security because it catches intruders or alerts you to activity. PIR sensors also save energy since lights stay off when nobody is around. They work best in areas where you expect occasional movement, like driveways or side yards.
The downside? PIR sensors can miss slow movements. A person creeping carefully might not trigger the light. Animals and wind can also cause false activations. You’ll need to adjust the sensitivity settings to find the right balance for your space.
Dusk to dawn sensors work differently. They turn lights on automatically when darkness falls and off when sunrise arrives. These sensors use light detection, not motion. This option provides consistent coverage all night long. It’s ideal for areas where you want constant visibility, such as front porches or security perimeters.
Dusk to dawn lights use more energy since they run the entire night. However, they offer reliable, predictable lighting without false triggers. This makes them perfect for consistent security or ambiance.
Consider your actual needs when deciding. Do you want lights that respond to activity? Choose PIR motion sensors. Do you prefer steady, all night lighting? Pick dusk to dawn controls. Some flood lights offer both options, letting you switch between modes depending on the season or situation.
Think about your property layout too. Motion sensors work well for targeted areas. Dusk to dawn lights suit perimeter security better. Combining both types in different locations gives you flexible, smart lighting throughout your outdoor space.
Evaluating Voltage, Wattage, and Energy Efficiency
Voltage and wattage form the foundation of any outdoor flood light system. Understanding these two factors helps you choose lights that work safely with your home’s electrical setup.
Most outdoor flood lights run on either 120 volts or 240 volts. Your home’s standard outlets provide 120 volts, which makes these lights easier to install without hiring an electrician. However, 240 volt systems deliver more power and work better for larger properties or multiple lights running simultaneously.
Wattage tells you how much electricity the light consumes. Traditional incandescent flood lights use 65 to 500 watts depending on brightness. LED flood lights use significantly less wattage while producing the same or better light output. A 10 watt LED light often matches a 60 watt incandescent bulb in brightness.
Energy efficiency directly impacts your monthly electric bills. LED lights cost more upfront but save money over time because they use 75 to 80 percent less energy than older technologies. If you run your flood lights for several hours daily, the savings add up quickly.
Calculate your actual energy needs by multiplying wattage by hours of use. A 50 watt LED light running 8 hours daily uses 400 watt hours or 0.4 kilowatt hours per day. Over a month, that equals roughly 12 kilowatt hours.
Check your home’s electrical panel capacity before installing multiple flood lights. Most residential panels handle 100 to 200 amps total. Adding several high wattage lights might require an upgrade if your panel already runs near capacity.
Consider solar powered options if running electrical wiring seems complicated. These lights charge during the day and operate at night without drawing from your home’s power supply. They work best in sunny climates and require minimal installation effort.
Match your voltage and wattage choices to your property size, climate, and daily usage patterns for optimal performance and cost efficiency.
Step-by-Step: How to Select the Right Flood Light for Your Space
Start by measuring your outdoor space. Know the area you want to light. A small patio needs different brightness than a large driveway or backyard.
Next, identify your main goal. Do you want security lighting around your home? Are you lighting a pathway? Perhaps you need accent lighting for landscaping? Your purpose shapes every other decision you make.
Check your existing electrical setup. Look at your home’s electrical panel to see what capacity you have available. This tells you how many flood lights you can safely install. If you lack spare circuits, you may need an electrician’s help.
Consider your mounting options carefully. Examine the walls, posts, or structures where you could attach lights. Higher mounting typically provides better coverage. Lower mounting gives more focused illumination. Think about obstacles like trees or roof overhangs that might block the light beam.
Test your space during different times. Visit your outdoor area at dusk and night. Notice which spots feel dark or unsafe. Mark these problem areas. This shows you exactly where flood lights will help most.
Measure the distance between your mounting location and the area you want lit. This measurement helps you choose the right lumen output. A light mounted 10 feet high needs different brightness than one mounted 20 feet high.
Think about your local weather patterns. If you live in a humid coastal area, you need extra weatherproofing. Heavy rain or snow affects light performance too.
Check for nearby structures or features. Do you have power outlets nearby? Are there water sources that could cause electrical hazards? Will the light bother neighbors in adjacent properties?
Write down all your findings before shopping. Include space measurements, mounting heights, weather conditions, and your primary lighting goal. This information keeps you focused on what actually works for your specific situation.
Proper Installation Techniques for Maximum Coverage
Proper installation makes the difference between adequate lighting and excellent coverage. Your mounting location sets the foundation for everything else. Place flood lights at corners of your property, along pathways, or near entry points where you need security. Higher placement generally works better—aim for 8 to 12 feet up on walls, posts, or eaves.
The angle matters just as much as the height. Point your lights downward at a 45 degree angle rather than straight out or straight down. This spreads the beam across your target area instead of creating dark spots. Test different angles before finalizing installation to see where the light actually lands.
Consider what you’re trying to light. Security requires different positioning than accent lighting. For security, aim lights to illuminate potential blind spots and entry areas. For general outdoor activities, spread multiple fixtures to avoid harsh shadows and dark zones.
Weatherproofing during installation prevents costly repairs later. Ensure your mounting hardware sits properly and won’t collect water. Use weatherproof sealant around wire entry points. Check that your fixture’s IP rating matches your climate—coastal areas need IP67 or higher due to salt spray exposure.
Wiring requires careful attention to safety. Run electrical cables through conduit to protect them from damage. Keep wiring away from water collection areas and moving parts. Bury underground wiring at least 12 inches deep if your area allows it.
Test your installation at night before considering it complete. Walk through your lit areas to spot gaps or overly bright spots. Adjust angles as needed. Make sure no glare reaches neighboring properties or creates safety hazards.
Proper installation also means checking all connections regularly. Loose mounting brackets or corroded terminals reduce light output and create fire risks. Inspect your setup seasonally, especially after severe weather.
Common Mistakes to Avoid When Choosing and Installing Flood Lights
People make several critical errors when selecting and installing outdoor flood lights. Understanding these mistakes helps you avoid expensive fixes and poor performance later.
Mounting height mistakes rank among the most common problems. Many homeowners place flood lights too low, which creates glare and shadows instead of proper coverage. Too high, and the light spreads too thin. The best height depends on your beam angle and the area you want to illuminate. Test different heights before finalizing installation.
Incorrect angle positioning wastes light and reduces security effectiveness. Simply pointing a flood light in a general direction rarely works well. You need to aim the light at specific areas you want protected. Adjust the angle gradually during evening hours to see actual results. What looks good during daylight often disappoints at night.
Overlooking weatherproofing leads to rust, corrosion, and early failure. Check that all connections are sealed properly. Water entering electrical components causes short circuits and safety hazards. Use weatherproof conduit for any exposed wiring. Ensure your fixture has an IP65 rating or higher for outdoor use.
Inadequate wiring preparation creates dangerous situations. Running undersized wires causes voltage drops and reduced brightness. Improper grounding increases shock risk. Always check your home’s electrical panel capacity before adding multiple lights. If you lack electrical experience, hire a professional for wiring work.
Ignoring beam angle needs results in poor coverage patterns. A 90 degree beam covers less area than a 120 degree beam. Match the beam angle to your space dimensions. Narrow angles work for accent lighting. Wide angles suit security applications.
Failing to consider local weather means choosing lights that won’t survive your climate. Coastal areas need corrosion resistant fixtures. Regions with heavy snow require sturdy mounting brackets. Research your area’s specific environmental challenges before purchasing.
Troubleshooting Common Outdoor Flood Light Issues
When your outdoor flood lights stop working properly, start by checking the power source first. Verify that your circuit breaker hasn’t tripped and that the outlet receives electricity using a simple test lamp or multimeter.
Flickering lights often signal loose connections. Turn off power at the breaker, then inspect all wire terminals and connections at the fixture. Tighten any loose wires you find. Corrosion around connection points also causes flickering, so clean corroded terminals with a wire brush before reconnecting them.
If your light won’t turn on at all, test the bulb next. Remove it carefully and examine the base for burn marks or discoloration. A darkened bulb has failed and needs replacement. Install a new bulb rated for outdoor use with the correct wattage specification.
Motion sensors that malfunction require a different approach. Most sensor issues stem from dirt or debris blocking the sensor lens. Clean the sensor window gently with a soft cloth. If your light activates randomly, the sensor may need repositioning away from heat sources like air conditioning units or reflective surfaces.
Dim lighting despite new bulbs suggests weathering damage. Check your fixture’s lens for cracks, cloudy buildup, or water inside the housing. These problems reduce light output significantly. Clean the lens with appropriate outdoor cleaner, and if cracks exist, the fixture needs replacement.
Water inside the fixture indicates failed weatherproofing seals. This causes corrosion and electrical hazards. Drain any water you find and allow the fixture to dry completely before reinstalling. If water returns, the seals have failed permanently and the fixture requires replacement.
Test your installation during nighttime conditions to identify remaining issues. Most problems appear obvious once you see the actual light pattern and coverage. Address issues promptly to maintain both security and safety around your outdoor space.
Final Thoughts
Choosing the best outdoor flood lights comes down to matching specs with your specific needs. Beam angle, lumen output, and IP rating all play a role in how well your lights perform.
Think about your space first. A small backyard needs different lighting than a large driveway or commercial property.
Color temperature matters more than people realize. Lights between 3000K and 4000K work well for most outdoor spaces. They provide bright, natural light without feeling harsh.
Sensor type is another key decision. PIR sensors react to movement, while dusk til dawn sensors turn on automatically as the sun sets. Some homeowners prefer combining both for maximum flexibility.
Don’t forget about the practical side of ownership. Wattage affects your energy bill, and durability affects how often you’ll need replacements. A higher upfront cost sometimes means fewer headaches later.
Installation quality can make or break even the best flood light. Proper mounting height, correct angles, and solid weatherproofing all contribute to long term performance.
Skipping these steps often leads to the common problems we covered earlier. Flickering lights, weak coverage, and water damage all trace back to poor planning or rushed installation.
Take time to test your setup before calling the job finished. Walk around your property at night and check for dark spots or glare issues.
Small adjustments now save you frustration later. Moving a light a few inches or changing its angle slightly can transform your entire lighting setup.
The right flood lights protect your home and improve your outdoor spaces. They light up walkways, deter unwanted visitors, and make your property look great after dark.
Take your time comparing options. Focus on your actual needs rather than flashy features you won’t use.
With the right knowledge, you can pick outdoor flood lights that serve your home well for years to come.
Frequently Asked Questions
What beam angle do I need for my yard?
Beam angle determines how wide your light spreads. Most outdoor spaces work well with 90 to 120 degrees of coverage. A wider angle covers more ground but spreads light thinner. A narrower angle concentrates light in one spot.
For security around your entire yard, choose the wider range. If you want to light a specific pathway or entrance, a tighter angle works better. Match your beam angle to the area you need to protect.
How many lumens should my flood light have?
Lumens measure brightness. Your needs depend on space size. A small patio needs around 700 to 1,000 lumens. Medium yards typically require 1,500 to 3,000 lumens. Large properties may need 4,000 to 5,000 lumens or more.
Higher lumens mean brighter output, but they also use more energy. Start by thinking about what you want to light. A dark corner needs fewer lumens than an open backyard. You can always add more lights instead of buying one super bright fixture.
What does IP rating mean?
IP rating tells you how well a light resists water and dust. Look for IP65 or higher for outdoor use. The first number (IP6) means dust protection. The second number (IP5) means water resistance from spray.
Lower ratings like IP44 won’t survive heavy rain or direct water contact. Outdoor flood lights face constant weather exposure. A strong IP rating prevents rust, corrosion, and electrical failure. Don’t skip this spec.
Should I choose motion sensors or dusk til dawn?
Motion sensors turn lights on only when they detect movement. They save energy and deter intruders. Dusk til dawn lights activate automatically at sunset. They provide constant security all night.
Motion sensors work great for entryways and pathways. Dusk til dawn suits larger areas you want lit all evening. Some people use both types in different locations around their home.

DK is the founder and lead writer at Smart Lighting Finds, where he helps readers discover the best lighting products through honest, hands-on reviews and in-depth comparisons. With a deep passion for home improvement and smart technology, DK is dedicated to making every lighting decision easier and brighter for his readers.