How to Choose Weatherproof Lights for Your Deck?
Your deck deserves lights that shine bright and survive every storm. Rain, snow, and harsh sun can ruin cheap fixtures fast. That’s why picking the right weatherproof lights matters so much.
Weatherproof lighting keeps your outdoor space safe and beautiful all year long. It resists moisture, dust, and temperature swings without failing. The right lights turn your deck into a cozy spot for every season.
Many homeowners make the mistake of buying lights before planning their needs. This leads to poor visibility or fixtures that break down quickly. Understanding IP ratings and fixture types helps you avoid costly errors.
This guide walks you through everything you need to know. You’ll learn how IP ratings protect your investment from rain and water. We’ll cover different fixture types like post caps, rail lights, and step lights.
You’ll also discover how to balance energy efficiency with your budget. We’ll explain why layering multiple light sources creates the best results.
By the end, you’ll know exactly what to look for. Your deck will glow safely through rain, snow, and everything in between.
In a Nutshell
Here’s a quick rundown before you shop for deck lights.
-
Check the IP rating first. Look for at least IP65 for most deck areas. Choose IP67 for spots that get direct water exposure like near stairs or planters.
-
Know your purpose before picking fixtures. Decide if you need lights for security, ambiance, or style. This choice shapes everything else you buy.
-
Pick the right fixture type for each spot. Post cap lights work great on railings. Step lights help guests see edges clearly at night.
-
Think about energy use and long term cost. LED lights save power and last longer than older bulb types. They handle outdoor weather well too.
-
Plan for every season your deck faces. Snow, rain, and heat all affect how lights perform. Pick fixtures that handle your local climate.
-
Layer your lighting for the best results. Combine several fixture types instead of relying on just one. This creates better visibility and a nicer look overall.
Understanding IP Ratings and Weatherproof Standards
IP ratings tell you how well lights handle water and dust. The “IP” stands for Ingress Protection. Two numbers follow it. The first number rates dust protection (0 to 6). The second number rates water protection (0 to 8).
For deck lighting, the water number matters most. IP65 is your minimum standard for most deck surfaces. This rating means water sprayed from any direction won’t harm the light. It handles rain, splashing, and general moisture exposure.
IP67 is better for direct water contact. Use this rating near pools, hot tubs, or areas where lights sit low and get splashed frequently. IP67 fixtures survive temporary immersion in water up to 3 feet deep.
The first number in IP ratings also counts. A rating of IP65 means dust protection level 6. This protects against dust completely. For outdoor decks, dust protection keeps dirt and debris from entering the fixture and causing corrosion or failure.
Some lights carry IP68 ratings. These fixtures withstand continuous immersion. You don’t need this level for most decks, but it works well in wet climates or near water features.
Always check the manufacturer’s weatherproof certification. Look for labels showing the light meets outdoor standards. Some certifications come from industry organizations that test durability and safety.
Don’t confuse “water resistant” with “waterproof.” Water resistant means some water protection exists, but it’s not guaranteed. Waterproof (usually IP65 or higher) means the light survives wet conditions reliably.
Your deck’s location affects which rating you need. Sunny, dry climates may work fine with IP65. Rainy regions or decks near water features need IP67 or higher.
Check ratings before you compare styles or prices. A beautiful light that fails after one season costs more than a slightly less attractive one that lasts for years.
Defining Your Deck’s Lighting Purpose: Security, Ambiance, or Aesthetics
Your deck’s lighting serves different purposes. You need to figure out which one matters most before you buy anything. This decision shapes every choice you make next.
Security lighting keeps your deck safe after dark. You want bright, even light across walking areas and stairs. Motion sensors help here because they alert you to movement. Bright white light works best for security because it shows details clearly.
Ambiance lighting creates a mood for relaxation. Warm, soft light feels inviting and comfortable. You might use dimmer switches to adjust brightness for different times of night. String lights or lanterns work well for this purpose because they feel cozy.
Aesthetic lighting highlights your deck’s best features. It draws attention to railings, plants, or architectural details. Accent lights create visual interest and make your space look intentional. You can use color or warm tones to enhance the deck’s style.
Many homeowners mix all three purposes. You might need bright security lights near steps, softer ambiance lights for seating areas, and accent lights to showcase design elements. This layered approach gives you flexibility.
Your deck’s usage affects which purpose takes priority. A high traffic deck with kids needs strong security lighting. A quiet retreat space benefits from gentle ambiance. An entertaining area works best with a combination.
Think about how often you use your deck too. Daily use demands reliable, practical lighting. Occasional use might let you focus more on aesthetics. Seasonal changes matter as well. Winter nights are longer, so security lighting becomes more important.
Write down your deck’s main purpose before shopping. Ask yourself what you actually need the lights to do. Do you want to see clearly? Feel relaxed? Show off your space? Your answer guides everything that follows.
Exploring Deck Light Fixture Types: Post Caps, Rails, and Steps
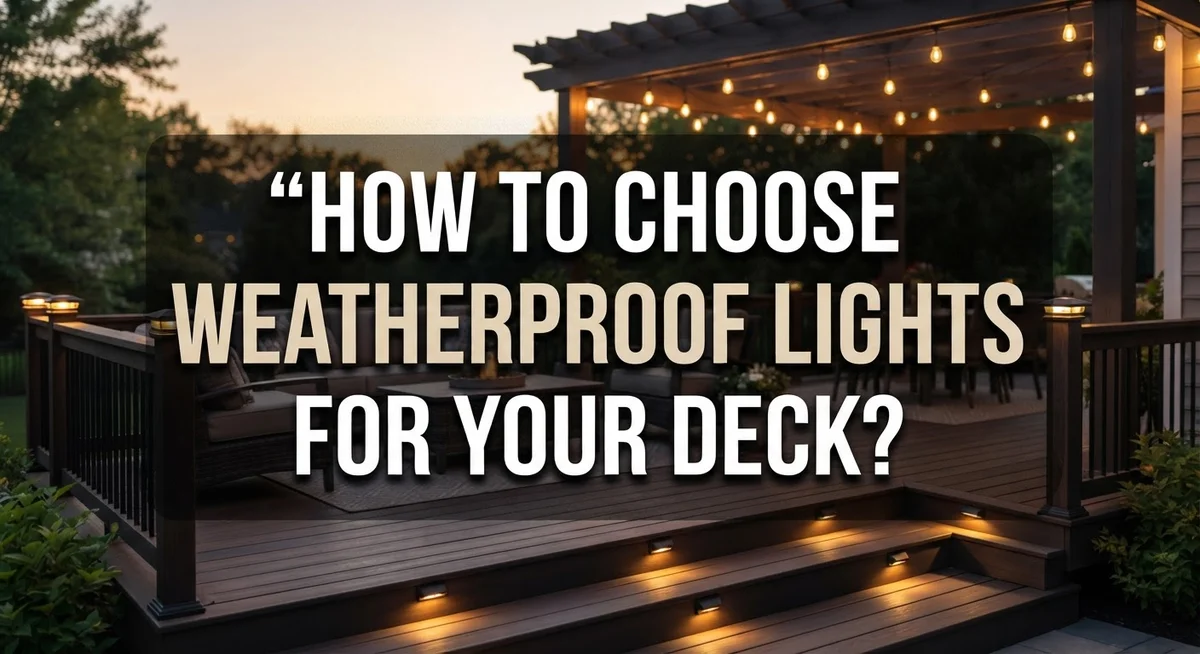
Post cap lights sit on top of your deck posts and serve multiple functions at once. They provide security by lighting pathways and stairs. They also add visual interest to your deck’s structure.
Rail lights attach directly to your deck railing and spread light across the deck surface. These fixtures work well for ambient lighting that covers larger areas. They’re especially useful if you want consistent illumination without too many fixtures.
Step lights mount flush into your deck stairs or the sides of steps. They guide people safely across your deck at night. Step lights also create a welcoming appearance when guests arrive.
Each fixture type has different IP rating requirements. Post cap lights need at least IP65 since they face rain and wind from all directions. Rail lights also need IP65 minimum. Step lights should meet IP67 standards because water pools around them during rain or snow melt.
Consider your deck’s layout when choosing fixture types. A large open deck might benefit from multiple rail lights spaced evenly. A small deck with stairs could rely mainly on step lights and one post cap light.
Mix fixture types for the best results. Combining post caps, rails, and steps creates layered lighting that serves multiple purposes. This approach prevents dark corners and ensures safe movement across your entire deck.
Think about your deck’s materials too. Composite decking reflects light differently than wood. Metal railings conduct heat, so check that fixtures won’t get too hot in direct sunlight.
The number of fixtures you need depends on your deck size and shape. A 12×16 foot deck typically needs more lights than a 8×10 foot space. Count your posts, measure your railing length, and count your steps before shopping.
Installation location matters significantly. Fixtures on the deck’s north side face more moisture exposure. South facing areas dry faster after rain. Position lights accordingly based on your local weather patterns.
Step-by-Step Process for Selecting the Right Weatherproof Lights
Start by measuring your deck space and identifying where you need light most. Walk around your deck at dusk to see which areas feel dark or unsafe. This simple step tells you exactly where to place fixtures.
Next, list the activities you do on your deck. Do you entertain guests, grill food, or just relax? Each activity needs different light levels. A dining area needs brighter light than a lounge corner.
Check your deck’s exposure to water and weather. Areas near pools, hot tubs, or low spots that collect rain need higher IP ratings. Sheltered corners under a roof need less protection. Mark these zones on a sketch of your deck.
Consider the time of year you use your deck most. Summer entertaining requires different lighting than winter gatherings. Some homeowners need lights year round, while others only use their deck seasonally.
Think about your deck’s existing style and colors. Lights should complement your home’s architecture. Warm light tones work well with traditional decks, while cool tones suit modern designs.
Evaluate how much light you actually need. Many people over light their decks. Too much brightness washes out the space and ruins relaxation. Aim for enough light to see safely, not stadium brightness.
Calculate the total area you want to illuminate. Larger decks need more fixtures or brighter individual lights. A small deck might need just two or three fixtures, while a large one needs five or more.
Write down your specific needs before shopping. Include the number of fixtures required, the areas they’ll cover, and your style preferences. This list keeps you focused on what actually works for your deck, not just what looks nice in photos.
Creating a Layered Lighting Strategy for Deck Spaces
A layered lighting strategy means using multiple types of fixtures at different heights and locations. This approach creates balanced, functional light across your entire deck space.
Start by identifying the main zones on your deck. You might have a dining area, seating area, and walkway. Each zone needs different light levels and fixture types to work well together.
Post cap lights form your first layer. They sit high on deck posts and cast light downward. This layer provides general illumination and helps define your deck’s perimeter. Post caps work best with an IP65 rating since they face direct weather exposure.
Rail lights create your second layer. These fixtures mount to railings and shine light across seating areas. Rail lights are lower than post caps, so they reduce glare in people’s eyes. They also highlight your deck’s safety features like edges and steps.
Step lights serve as your third layer. These recessed or surface-mounted fixtures guide people safely along stairs and pathways. Step lights need IP67 ratings because water pools around steps more easily. They use less power than post caps but provide critical visibility.
The key is spacing your fixtures evenly. Uneven spacing creates dark spots where people might trip. Aim for consistent light coverage across walking paths and seating zones.
Consider brightness levels too. Your dining area might need brighter light than a relaxation zone. Mixing fixture types lets you control light intensity in each area without overlighting your entire deck.
Test your layered approach before finalizing placement. Use temporary lights to see how different combinations work together. This helps you spot problem areas like shadows or overly bright spots.
Layered lighting also improves energy efficiency. You use only the light you need in each zone rather than flooding your entire deck with one bright fixture type.
Seasonal and Environmental Factors Affecting Deck Lighting
Seasonal changes and weather patterns directly affect how your deck lighting performs throughout the year. Understanding these factors helps you choose lights that work reliably in your specific climate.
Winter weather brings unique challenges to deck lighting. Snow, ice, and freezing rain create harsh conditions. Your lights need higher IP ratings during winter months because moisture accumulates differently. Cold temperatures can also reduce battery life in solar or wireless lights. Consider whether you use your deck year round or mainly in warmer months. If you live in cold climates, select fixtures rated for extreme temperature swings.
Summer presents different concerns for deck lighting. High humidity and intense sun exposure wear on fixtures over time. UV rays fade materials and degrade seals. Rain becomes more frequent in many regions during summer. Fixtures near pools or water features face constant moisture exposure. These areas need IP67 ratings instead of the standard IP65.
Spring and fall transitions matter too. Temperature fluctuations cause materials to expand and contract. This movement can compromise waterproof seals if fixtures aren’t quality rated. Seasonal storms bring wind, hail, and heavy downpours that test your lighting’s durability.
Your location’s rainfall patterns influence fixture selection. Coastal areas experience salt spray that corrodes metal components. Desert regions have intense sun but less moisture. Humid tropical climates demand superior waterproofing. Mountain areas face rapid weather changes and temperature extremes.
Think about when you actually use your deck. If you entertain mainly in summer, you can prioritize heat and humidity resistance. Winter enthusiasts need cold weather performance. Year round users need lights that handle all seasonal extremes.
Check your local weather history before purchasing. Look at average rainfall, temperature ranges, and humidity levels. This information guides you toward appropriate IP ratings and materials that survive your specific environment.
Common Mistakes to Avoid When Choosing Deck Lights
Many people rush into buying deck lights without understanding what they truly need. This leads to wasted money and poor lighting results. The biggest mistake is choosing fixtures before defining your actual purpose. Are you lighting for safety, ambiance, or entertaining? Each purpose requires different brightness levels and fixture placement.
Another common error involves ignoring IP ratings entirely. Fixtures rated below IP65 will fail quickly on your deck. Water and moisture penetrate these lights, causing rust and electrical problems. If your deck has areas with direct water exposure like near a hot tub or in low spots that collect rain, you need IP67 rated fixtures minimum. Settling for cheaper, lower-rated lights costs more in the long run.
People often overlook seasonal water exposure when planning their layout. A light that works fine in summer might fail during spring rains or winter snow melt. You need to think about how water flows across your deck during heavy weather. Placing lights in direct water paths without proper protection guarantees failure.
Over lighting is another frequent mistake. Many homeowners install far more lights than necessary, wasting energy and creating harsh glare. You don’t need your deck as bright as a parking lot. Calculate your actual visibility needs based on how you use the space.
Choosing style before checking functionality is also problematic. That beautiful fixture might not have the weatherproofing you need. Match your aesthetic preferences to fixtures that actually protect against your local climate conditions.
Finally, people forget to account for maintenance access. Lights mounted in awkward spots become difficult to clean or replace. Plan your fixture locations so you can easily maintain them throughout the year. This simple step prevents frustration and extends your lighting system’s lifespan significantly.
Final Thoughts
Choosing weatherproof lights for your deck does not need to feel overwhelming. Start with your purpose first. Ask yourself why you need light and where you need it most.
Once you know your purpose, everything else becomes easier. You can pick fixtures that match your actual needs instead of guessing.
IP ratings matter more than looks. Always check for a minimum IP65 rating before buying anything. Areas with direct water exposure need IP67 protection instead.
A pretty fixture with poor weatherproofing will fail quickly. It might look great for a few months, then crack, rust, or stop working entirely.
Layering your lights creates the best results. Combine post cap lights, rail lights, and step lights for full coverage. This approach gives you both safety and style across your entire deck.
Think about your climate too. Snow, salt spray, and intense sun all affect how long your fixtures last. Choose materials that suit your specific weather patterns.
Energy efficiency saves money over time. LED lights use less power and last longer than older options. They also produce less heat, which matters for safety.
Do not rush this decision. Take time to measure your space and plan your zones. Write down what you need before you start shopping.
Avoid the common mistakes we covered here. Skip fixtures with weak IP ratings. Do not overload your deck with too much light. Always plan for easy maintenance access.
Good deck lighting balances function and beauty together. It keeps you safe while making your outdoor space feel warm and inviting.
Take your time, check the ratings, and think about your specific deck. With the right planning, you will find weatherproof lights that last for years and make your evenings outside more enjoyable.
Frequently Asked Questions
What does IP rating actually mean for deck lights?
IP rating stands for Ingress Protection. It tells you how well a fixture resists water and dust. The first number rates dust protection (0 to 6). The second number rates water resistance (0 to 8).
For deck lights, you need at least IP65. This means dust tight and protected from water jets. If your lights sit where water pools or splashes directly, choose IP67 instead. That rating handles temporary water immersion.
Can I use regular indoor lights outside on my deck?
No, you should not. Indoor lights lack weatherproof seals. Moisture gets inside quickly and causes corrosion and electrical failure. Outdoor rated fixtures have special gaskets and materials that resist rain, humidity, and temperature swings.
Always look for fixtures labeled as “outdoor rated” or “weatherproof.” These cost more upfront but last much longer and stay safe.
Why do some deck lights fail faster than others?
Location matters greatly. Salt spray near coastal areas corrodes metal fixtures faster. High humidity in tropical regions speeds up rust and corrosion. Freezing temperatures crack plastic components over time.
Poor drainage around fixtures also causes early failure. Water pools and seeps into gaps. Choose fixtures with drainage holes and proper sealing. Install them where water runs away naturally, not toward the light.
How many lights do I actually need on my deck?
This depends on your deck size and how you use it. A small sitting area needs fewer lights than a large entertaining space. Think about visibility first, not brightness.
Most people benefit from layered lighting. Combine post cap lights, rail lights, and step lights for balanced coverage. This approach creates both safety and ambiance without overdoing it.

DK is the founder and lead writer at Smart Lighting Finds, where he helps readers discover the best lighting products through honest, hands-on reviews and in-depth comparisons. With a deep passion for home improvement and smart technology, DK is dedicated to making every lighting decision easier and brighter for his readers.