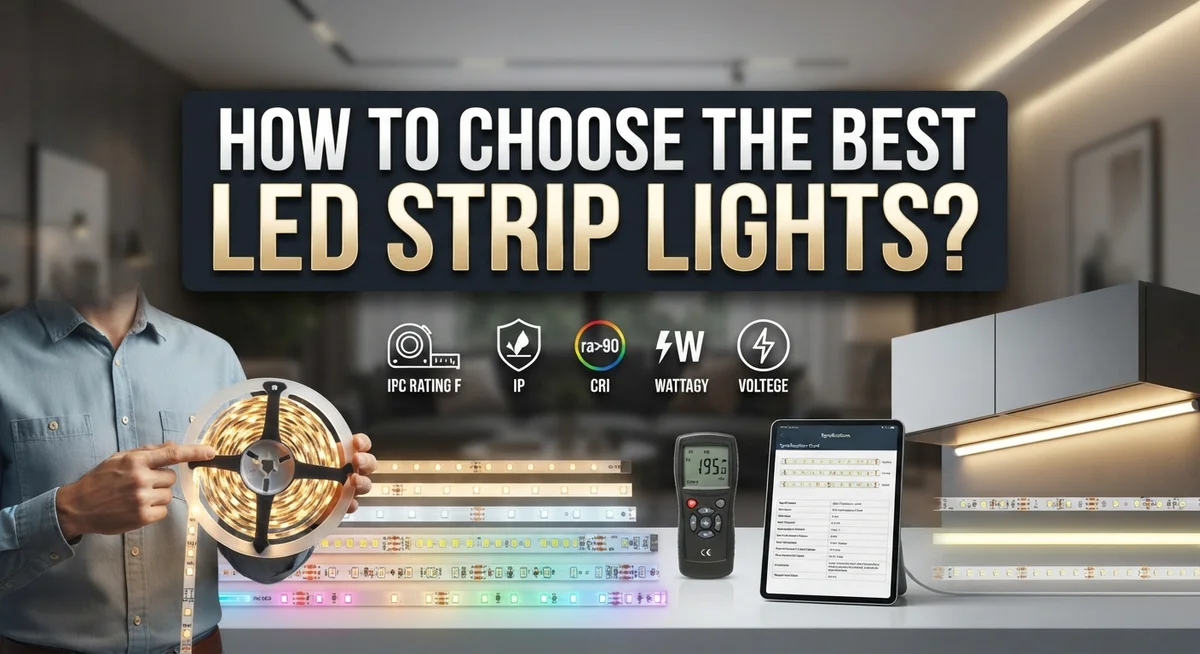
How to Choose the Best LED Strip Lights: A Complete Buying Guide
LED strip lights can transform any room in your home. They add glow to kitchens, bedrooms, and living spaces alike.
But picking the right one feels tricky. So many options exist, and each has different specs.
You might wonder about brightness levels. Or maybe power supply size confuses you. Color temperature adds another layer to consider too.
This guide breaks down everything you need to know. We cover lumens per meter and why brightness matters for your space.
You will learn how CRI and color temperature affect light quality. We also explain power supply sizing so you avoid common wiring mistakes.
Application matters too. Task lighting for kitchens differs from ambient lighting for bedrooms.
We walk through measuring your space correctly. Then we cover choosing between white, RGB, and RGBW options.
Finally, we highlight mistakes people often make. Voltage mismatches and undersized power supplies top that list.
By the end, you will feel confident selecting strips that fit your exact needs. No guesswork required.
Let’s get started on finding your perfect LED strip light setup.
In a Nutshell
Choosing the right LED strip light comes down to a few key factors. Here’s a quick recap to keep in mind before you buy:
-
Check the lumens per meter. This tells you how bright the strip will be. Kitchens and work areas need higher output than cozy bedrooms.
-
Pick the right color type. White strips work great for task lighting. RGB or RGBW strips suit ambient and decorative moods.
-
Match your power supply correctly. Your LED load should stay at or below 80% of your power supply’s max wattage. This gives you safe headroom.
-
Measure your space first. Know your exact installation length before you shop. This helps you avoid buying too much or too little.
-
Respect maximum run limits. Every strip has a limit on how far it can run without voltage drop issues. Going beyond this causes dimming or flickering.
-
Watch for common mistakes. Voltage mismatches and undersized power supplies are the biggest culprits behind poor performance.
Keep these points handy. They will help you make a smart, informed choice for any room in your home.
Understanding LED Strip Basics: Brightness, Color Temperature, and CRI
Brightness, color temperature, and CRI form the foundation of LED strip selection. Understanding these three elements helps you pick strips that deliver the exact light quality your space needs.
Lumens per meter measures brightness intensity. Higher lumens mean brighter light output. A kitchen or workspace needs 800 to 1200 lumens per meter for proper task lighting. Living rooms and bedrooms work well with 400 to 600 lumens per meter for ambient lighting. Check the lumens specification before purchasing to ensure the strip meets your brightness requirements.
Color temperature describes whether light appears warm or cool. Measured in Kelvin (K), warm white ranges from 2700K to 3000K and creates a cozy feeling. Neutral white sits around 4000K to 4500K and works well in kitchens and offices. Cool white reaches 5000K to 6500K and suits task areas needing alertness. Your room’s purpose should guide this choice.
CRI stands for Color Rendering Index. This rating shows how accurately colors appear under the light. A CRI of 80 or higher reproduces colors naturally and realistically. Task areas and spaces where color accuracy matters should use high CRI strips. Decorative or ambient lighting can use lower CRI strips without problems.
These three factors work together to create your desired lighting experience. A bright, cool white strip with high CRI suits a kitchen perfectly. A warm white strip with moderate brightness and lower CRI works great for accent lighting in a bedroom.
Before you choose, think about what the space does. Will you read, cook, or relax there? Answer this question first, then select lumens, color temperature, and CRI accordingly. This approach ensures your LED strips deliver exactly what you need.
Step 1: Measure Your Installation Space and Length
Start by grabbing a measuring tape and finding the exact length of your installation area. Write down this measurement in feet or meters. Accuracy here prevents buying strips that are too short or too long for your space.
Next, think about the shape of your area. Is it a straight line along a shelf? Does it wrap around corners? Will it follow the contour of your ceiling? Understanding the layout helps you plan how many strips you need and where connectors go.
Check if your space has any obstacles. Outlets, switches, or architectural features might affect placement. Mark these spots on your sketch so you know where to position your strips and power supply.
Consider the accessibility of your installation area. Can you easily reach it for future maintenance? Will the strips stay hidden or be visible? This matters because some locations need flexible strips that bend around tight corners, while others work fine with rigid options.
Measure twice, cut once applies here too. Double check your measurements before ordering. A small mistake now means returning items or having gaps in your lighting.
Think about whether you need one long continuous strip or multiple shorter segments. Some spaces work better with separate sections connected together. This approach gives you flexibility if you change your mind later about placement.
Also note the height of your installation surface. Ceiling installations differ from wall or furniture placements. Height affects how light distributes in your room and influences the brightness level you’ll actually need.
Finally, sketch a simple diagram of your space with measurements labeled. Include the location of electrical outlets and any obstacles. This visual reference makes shopping easier and helps installers understand your setup. You now have everything needed to move forward with confidence in your selection process.
Step 2: Determine Brightness Needs Based on Application
Different spaces need different brightness levels. Your kitchen requires much more light than your bedroom. Think about what activities happen in each room.
Task lighting areas like kitchens, garages, and workbenches need high brightness. These spaces demand bright white strips with higher lumens per meter. You’ll want strips that deliver clear, focused light for cooking, working, or reading.
Ambient lighting serves a different purpose. Living rooms, bedrooms, and hallways benefit from softer, lower brightness levels. These areas use lighting to create mood and comfort rather than enable detailed work.
Decorative applications like accent lighting around shelves or behind televisions need even less brightness. RGB or RGBW strips work perfectly here since you’re adding visual interest, not illuminating a workspace.
Start by identifying your application type. Ask yourself what people will do in this space. Will they prepare food? Do detailed work? Relax and watch television? Sleep? Your answer determines your brightness target.
Kitchen and bathroom strips typically need 300 to 500 lumens per meter. These high brightness levels ensure you can see clearly while cooking or grooming. Bedroom and living room strips usually work well at 100 to 300 lumens per meter.
Check the product specifications for lumens per meter before buying. This number tells you exactly how bright the strip performs. Don’t guess based on appearance alone.
Consider whether you’ll run the strips at full brightness constantly. Some people install bright strips but use dimmers to reduce intensity when needed. This gives you flexibility to adjust light levels based on time of day or mood.
Write down your application type and brightness needs on a simple list. Keep this list handy as you continue through the selection process. It will guide all your remaining decisions about color temperature and power requirements.
Step 3: Choosing the Right Color Type — White, RGB, or RGBW
White LED strips emit a single, consistent color of light. They work best for task lighting where you need reliable, focused illumination. Kitchens, garages, and work areas benefit most from white strips because they provide steady brightness without color changes.
White strips come in different color temperatures. Cool white (5000K to 6500K) feels bright and energizing, similar to daylight. Warm white (2700K to 3000K) creates a cozy, relaxing atmosphere like traditional incandescent bulbs. Choose cool white for functional spaces and warm white for living areas.
RGB strips display red, green, and blue colors that mix together to create thousands of color options. You control the colors using a remote or app. RGB strips excel for ambient and decorative purposes. They work great behind televisions, around shelving, or in entertainment spaces where you want mood lighting that changes.
RGBW strips combine RGB capability with a dedicated white LED channel. This means you get full color options plus a reliable white light source. RGBW strips perform better than RGB alone because the white channel provides cleaner, brighter white light compared to mixing RGB colors together.
Consider your primary use when choosing between these types. If you mainly need steady, bright illumination for daily tasks, white strips make sense. If you want flexibility to change colors and create different moods, RGB or RGBW strips serve you better.
Budget matters too. White strips cost less than RGB or RGBW options. However, RGBW strips offer the best of both worlds if you need both task lighting and color flexibility. Think about whether you’ll actually use color changing features or if you prefer simplicity and savings with white only.
Step 4: Calculating Power Requirements and Sizing Your Power Supply
Now that you know your brightness needs and color type, it’s time to figure out how much power your LED strips actually require. This step ensures your power supply can handle the load without overheating or failing.
Start by finding the wattage per meter for your chosen LED strip. Manufacturers list this specification on product datasheets. It tells you exactly how many watts each meter of strip consumes. For example, a strip might use 10 watts per meter, while a brighter one uses 15 watts per meter.
Next, multiply the wattage per meter by your total installation length. If you’re installing 5 meters of a 12 watt per meter strip, you need 60 watts total. This is your LED load. Write this number down because you’ll use it to pick your power supply.
Here’s the critical rule: your LED load must never exceed 80 percent of your power supply’s maximum wattage. This 20 percent headroom prevents overheating and extends the lifespan of your power supply. If your total load is 60 watts, you need a power supply rated for at least 75 watts (60 divided by 0.80).
Always round up to the next available power supply size. If you calculate 75 watts, don’t buy a 75 watt supply. Choose an 80 or 100 watt model instead. This extra margin provides safety and allows for future expansions.
Consider whether you’ll run multiple LED strips from one power supply. Add up all the wattage requirements for every strip connected to that supply. Then apply the 80 percent rule to the combined total.
Voltage matters too. Most LED strips run on 12 volts or 24 volts. Make sure your power supply matches your strip’s voltage exactly. A mismatch will damage your strips immediately.
Step 5: Understanding Maximum Run Length Limits
Maximum run length refers to how far an LED strip can extend from its power supply before the light dims or stops working properly. This limit exists because electricity loses strength as it travels through the wire, a phenomenon called voltage drop.
Voltage drop happens naturally. When current flows through wire, resistance causes the electrical signal to weaken. The longer the wire, the more noticeable this effect becomes. Your LEDs at the far end receive less power than those near the power supply.
Most single run LED strips can extend 5 to 10 meters from the power supply before visible dimming occurs. Some high quality strips handle longer distances. Always check your specific strip’s documentation for its maximum recommended length.
Several factors affect how far your strip can run. Wire gauge matters significantly. Thicker wires resist less, so they maintain voltage over longer distances. Higher voltage systems (24V instead of 12V) also perform better across distance because they lose a smaller percentage of power.
To extend beyond maximum run length, you have practical options. You can install a second power supply midway through your installation. This approach splits your strip into two shorter segments, each staying within safe voltage limits. Alternatively, you can run thicker gauge wire from your power supply to the LED strip, reducing resistance.
Test your installation before finalizing it. Turn on the lights and observe brightness from start to finish. If the far end appears noticeably dimmer, you’ve exceeded your maximum run length. Reposition your power supply closer, add another supply, or upgrade your wire gauge.
Plan your layout carefully from the start. Measure your space, know your strip’s maximum run length, and position your power supply accordingly. This prevents frustrating dimming issues after installation. Always keep documentation handy so you reference the exact specifications for your chosen LED strip model.
Common Mistakes to Avoid When Selecting LED Strip Lights
People make several costly mistakes when picking LED strip lights. Understanding these errors helps you avoid wasting money and time on the wrong choice.
Voltage mismatches rank as the most common problem. LED strips come in 12V and 24V versions. If you buy a power supply that doesn’t match your strip’s voltage, nothing works. Always check your strip’s voltage before purchasing any components.
Ignoring brightness specifications causes major disappointment. Many buyers focus only on price and miss the lumens per meter rating. This number tells you how bright the strip actually is. A strip with low lumens will look dim even when fully powered. Read the specifications carefully for your specific application.
Overlooking color temperature requirements leads to poor results. Warm white light (2700K to 3000K) suits living rooms and bedrooms. Cool white light (4000K to 5000K) works better for kitchens and workspaces. Picking the wrong temperature ruins the atmosphere you’re trying to create.
Undersizing your power supply creates another frequent issue. Your LED load should never exceed 80 percent of the power supply’s maximum wattage. Many people buy undersized supplies to save money. This causes overheating, flickering, and premature failure of both the strip and supply.
Exceeding maximum run length without proper planning causes visible dimming. Most strips dim noticeably after 5 to 10 meters from the power supply. Voltage drop happens naturally as electricity travels through the wire. Ignoring this limit leaves you with uneven brightness across your installation.
Wrong LED type selection wastes resources too. Using RGB strips for task lighting is unnecessary. Using basic white strips when you want color flexibility is limiting. Match your strip type to your actual needs.
Take time to research your specific requirements before purchasing anything.
Final Thoughts
Choosing the best LED strip lights does not need to feel overwhelming. When you break it down into small steps, the whole process gets much easier.
Start with the basics. Measure your space first. Then think about brightness, color, and power needs one at a time.
Lumens per meter tell you how bright your strip will be. Kitchens and work areas need higher brightness. Bedrooms and living rooms often need softer light.
Color temperature and CRI also shape how a room feels. Warm white creates a cozy mood. Cool white suits task areas better. A high CRI makes colors look true and natural under the light.
Power supply sizing is where many people go wrong. Always keep your LED load at or below 80 percent of your power supply’s maximum wattage. This simple rule prevents overheating and keeps your strips running safely for years.
Do not forget about maximum run length. Every strip has a limit before voltage drop causes dimming. Plan your layout with this limit in mind from day one.
Think about your application too. RGB and RGBW strips work great for accent lighting and mood settings. Bright white, high density strips suit practical tasks like cooking or reading.
Avoid common mistakes like ignoring wattage, skipping color temperature checks, or guessing on power supply size. These small oversights lead to big frustrations later.
Take a moment to test your setup before you finalize everything. This helps you catch issues early and adjust before it is too late.
The best LED strip lights match your space, your needs, and your style. Focus on brightness, color, and power specs together. With careful planning, you will get lighting that looks great and works well for a long time.
Frequently Asked Questions
What brightness level do I need for my space?
Brightness depends on your room’s purpose. Task lighting areas like kitchens need higher lumens per meter to help you see clearly while cooking or working. Ambient or decorative lighting requires less brightness since you want mood over function.
Measure your space first. Then decide if you need bright white strips for work areas or softer options for bedrooms and living rooms. Check the lumens per meter specification on the strip’s details.
How do I calculate the right power supply size?
Your power supply must handle your LED strip’s total wattage safely. The golden rule is keeping your LED load at 80% or less of the power supply’s maximum capacity.
First, find your strip’s wattage per meter. Multiply this by your total installation length in meters. Then divide by 0.80 to find the minimum power supply wattage you need.
For example, a 5 meter strip using 10 watts per meter needs 50 watts total. Divide 50 by 0.80 to get 62.5 watts minimum. Choose a power supply rated for 65 watts or higher.
Which color temperature should I choose?
Color temperature affects how a room feels. Warm white (2700K to 3000K) creates cozy, relaxing atmospheres in bedrooms and living rooms. Cool white (4000K to 5000K) works better in kitchens, offices, and bathrooms where you need clarity.
Natural white (3500K) fits most spaces as a middle ground. RGB or RGBW strips let you adjust colors for different moods and occasions.
Can I run LED strips continuously without breaks?
Yes, most LED strips handle continuous operation safely. However, ensure your power supply has adequate ventilation to prevent overheating. Check your strip’s specifications for maximum runtime recommendations.
If your strip gets warm during use, add small breaks or improve airflow around the power supply. This extends the lifespan of your entire system.

DK is the founder and lead writer at Smart Lighting Finds, where he helps readers discover the best lighting products through honest, hands-on reviews and in-depth comparisons. With a deep passion for home improvement and smart technology, DK is dedicated to making every lighting decision easier and brighter for his readers.