How to Hang Pendant Lights Over an Island: A Step-by-Step Guide
Pendant lights can turn a plain kitchen island into a stunning focal point. But hang them wrong, and they can look awkward or even block your view.
Good news: getting it right is simpler than you think.
This guide walks you through everything you need to know. You’ll learn the ideal height for hanging pendant lights above your island. We’ll also cover proper spacing between multiple fixtures.
Ever wondered how far pendants should sit from the island edge? We answer that too.
You’ll discover the exact installation steps, from turning off power to mounting your new fixture safely. We’ll also flag common mistakes people make, like overcrowding lights or ignoring ceiling height.
By the end, you’ll know how to create a balanced, functional look. Your island will feel bright, inviting, and picture perfect.
Whether you’re upgrading old fixtures or starting fresh, this article gives you clear, practical steps. No guesswork needed.
Let’s get your pendant lights hung the right way, once and for all.
In a Nutshell
Here’s the quick rundown for hanging pendant lights over your island.
-
Height matters most. Hang pendants 30 to 36 inches above the countertop. Measure from the bottom of the fixture to the counter surface.
-
Give it breathing room. Keep pendants 6 to 12 inches from the island edge. This keeps sightlines clear and prevents bumped heads.
-
Space them evenly. For multiple lights, leave 30 to 32 inches between each fixture. Even spacing creates a balanced look.
-
Safety comes first. Always turn off the power before touching wires. Disconnect the old fixture, then install a new mounting bracket.
-
Check before you commit. Confirm the hanging height before final installation. This step saves you from redoing the whole job.
-
Avoid common slip ups. Don’t overcrowd the space or mix mismatched styles. Watch your ceiling height too, since it affects fixture size and drop length.
Follow these points and your kitchen island will look sharp and function well. Small adjustments now prevent bigger headaches later.
Tools and Materials You’ll Need
Before you start hanging pendant lights, gather the right tools and materials. Having everything ready prevents frustration and keeps the job moving smoothly.
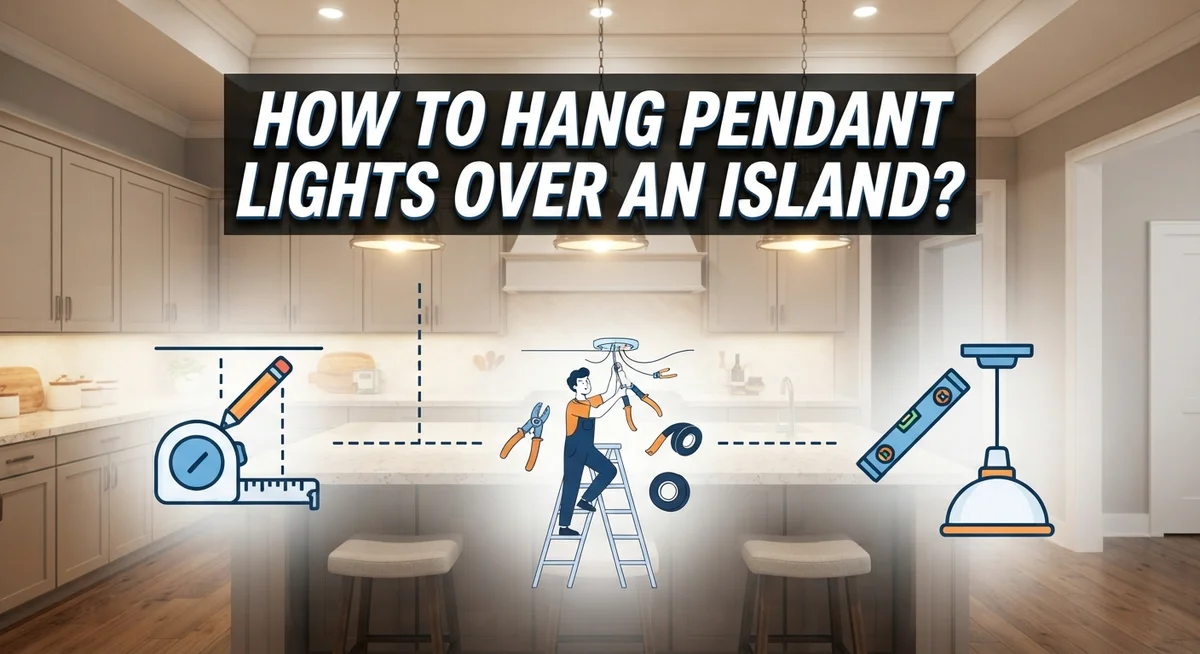
Electrical tools are essential. You’ll need a voltage tester to confirm the power is off before touching any wires. A wire stripper removes insulation from wire ends safely. Wire connectors join wires together securely. Electrical tape seals connections and prevents short circuits.
Measuring and marking tools ensure accuracy. A tape measure helps you find the correct height of 30 to 36 inches above the countertop. A level keeps your mounting bracket perfectly horizontal. A pencil marks mounting holes on the ceiling. A stud finder locates ceiling joists for secure installation.
Hanging hardware supports your fixtures. Most pendant lights come with a mounting bracket that attaches to the ceiling. You’ll need screws and anchors appropriate for your ceiling type, whether it’s drywall, plaster, or wood. Chain or cord suspends the light fixture at your desired height.
Basic hand tools complete your toolkit. A screwdriver (both Phillips and flathead) tightens fasteners. A drill creates holes for anchors and screws. An adjustable wrench handles any nuts or bolts. A flashlight illuminates tight spaces above the island.
Safety equipment protects you during installation. A sturdy ladder or step stool gives you safe access to the ceiling. Work gloves protect your hands from sharp edges and rough surfaces. Safety glasses shield your eyes from dust and debris.
The fixture itself includes the pendant light, its canopy (the decorative cover), and any included hardware. Check your manufacturer’s instructions for specific parts included with your model.
Gathering these items beforehand makes the entire process faster and safer. You won’t waste time searching for tools mid installation, and you’ll complete the job with confidence and accuracy.
Choosing the Right Height and Placement Above Your Island
The height of your pendant lights directly affects how well your kitchen functions and looks. The golden rule is 30 to 36 inches from the bottom of the fixture to your countertop surface. This distance keeps lights low enough to illuminate your work area without blocking sightlines across the kitchen.
Why does this specific range matter? Pendant lights positioned too high won’t provide adequate task lighting. You’ll end up with shadows on your counter and wasted light. Lights hung too low create a cramped feeling and can obstruct views between kitchen zones.
Measure twice, hang once. Start by measuring from your countertop up to where you want the fixture bottom to sit. Mark this point on your ceiling with a pencil. Use a level to ensure your marks are even if you’re installing multiple pendants.
Consider your ceiling height when planning. Standard kitchen ceilings are 8 to 9 feet tall. If your ceiling is lower, you may need to adjust slightly, but never go below 30 inches above the counter. Higher ceilings give you more flexibility.
Distance from the island edge matters equally. Position each pendant 6 to 12 inches away from the island’s perimeter. This spacing prevents lights from interfering with movement around your workspace. It also creates visual balance between the fixture and your island.
For multiple pendants, space them 30 to 32 inches apart. This even distribution creates a professional appearance and ensures consistent lighting coverage. Uneven spacing looks accidental and creates dark spots on your work surface.
Before drilling holes or installing mounting brackets, step back and visualize the final result. Hang a string from your ceiling at the proposed height. This simple trick lets you confirm the placement looks right from different angles in your kitchen.
Step-by-Step Installation Process
Before you pick up a drill, turn off the power at your circuit breaker. This is your most important safety step. Flip the switch to the off position and test it to confirm no electricity flows to the area.
Next, remove any existing fixture if one is present. Disconnect the wiring carefully by unscrewing the wire nuts that hold the cables together. Take a photo of the wire connections before you disconnect them. This helps you remember which wires go where during installation.
Install your new mounting bracket according to the manufacturer’s instructions. The bracket attaches to the junction box in your ceiling. Use the provided hardware and secure it firmly. A loose bracket creates safety hazards and causes fixtures to hang unevenly.
Before you finalize anything, hang your pendant at the correct height. Use a temporary support like a hook or rope to hold it in place. Stand back and look at how it sits above your island. Check if the height feels right for your space and ceiling.
Confirm that the pendant doesn’t block sightlines as you move around the kitchen. Make sure it won’t hit your head or interfere with daily movement. If you’re hanging multiple pendants, verify that they align properly and maintain even spacing.
Once you’re satisfied with the placement, connect the wiring. Match the wires according to the color coding: black to black, white to white, and ground to ground. Secure each connection with a wire nut and wrap it with electrical tape for extra safety.
Install the canopy, which is the decorative cover that hides the ceiling junction. Attach the pendant shade or globe. Turn the power back on and test your lights.
This step by step approach prevents mistakes and ensures your pendant lights hang securely and safely above your island.
Spacing Multiple Pendant Lights for Visual Balance
When you hang multiple pendant lights over your island, spacing them correctly creates visual balance and improves functionality. The key is consistent distance between each fixture.
Space your pendants 30 to 32 inches apart from center to center. This measurement keeps them from looking cramped while ensuring they work together as a cohesive group. If your island is shorter, you might only fit two pendants. Longer islands can accommodate three or even four lights.
Start by measuring your island length. Subtract the width of one pendant from the total length. Then divide the remaining space evenly between your fixtures. This math ensures equal gaps on both sides and between each light.
Visual balance matters more than perfect symmetry. If your island is 48 inches long and you’re hanging two pendants, position them 18 inches from each end. For three pendants on a 60 inch island, space them 15 inches from the edges and 15 inches from each other.
Mark your ceiling lightly with pencil before drilling. Stand back and look at your marks from different angles. Walk around your island as if you’re cooking or eating there. Make sure the lights don’t obstruct your view or create shadows where you need light.
Odd numbers of pendants often look more natural than even numbers. Three lights create a pleasing visual rhythm. Two lights work well for smaller islands. Four or more pendants suit very long islands.
Consider the pendant size when spacing. Larger fixtures need more breathing room. Smaller pendants can sit closer together. The visual weight of each light affects how far apart they should hang.
Once you’ve confirmed your spacing, you’re ready to install. This planning stage prevents expensive mistakes and ensures your kitchen island looks intentional and balanced.
Adjusting for Ceiling Height and Fixture Size
Ceiling height determines how much hanging space you have. Standard kitchens have 8 to 9 foot ceilings, which gives you room to hang pendants at the ideal 30 to 36 inches above your countertop. If your ceiling sits lower, you may need to adjust your fixture selection or hanging height slightly.
Measure your ceiling height first. Use a tape measure from the floor to the ceiling. Subtract your countertop height (usually 36 inches) to find how much vertical space exists above your island. This calculation tells you if standard pendant sizing works in your kitchen.
Fixture size matters because large pendants can feel overwhelming in tight spaces. A pendant with a 12 inch diameter works well in most kitchens. Smaller fixtures around 8 inches suit compact islands or low ceilings. Larger pendants (16 inches or more) need higher ceilings and bigger islands to maintain proper proportions.
Don’t let the fixture hang so low that it blocks your view across the kitchen. Your sightline should pass above the pendant bottom. This keeps the space feeling open and functional. If your ceiling is particularly low, consider smaller diameter fixtures or shorter hanging lengths to maintain clearance without sacrificing style.
The distance from your island edge also affects how the fixtures appear. Pendants positioned 6 to 12 inches from the perimeter look balanced and don’t interfere with movement around the island. This spacing works regardless of your ceiling height.
When hanging multiple pendants, maintain 30 to 32 inches between each fixture center. This spacing adapts to different ceiling heights and island lengths. Adjust individual cord lengths slightly if needed to keep all fixtures at the same height, even if your ceiling has slight slopes.
Test your planned height before making permanent installations. Hang a mock fixture using rope or chain at the calculated distance. Stand in different spots around your kitchen and confirm the height feels right for your space.
Common Mistakes to Avoid When Hanging Pendant Lights
Hanging pendant lights over an island sounds simple, but several mistakes can ruin your final result. Understanding what goes wrong helps you avoid expensive do-overs and safety issues.
Hanging lights too high is one of the biggest errors homeowners make. Pendant lights should sit 30 to 36 inches above your countertop. Many people hang them at standard ceiling light heights, which creates poor task lighting and looks awkward over an island workspace.
Placing fixtures too close together destroys visual balance. Your pendants need 30 to 32 inches of space between their centers. Crowding them together makes the area feel cluttered and wastes the opportunity to light different zones of your island.
Another common mistake is ignoring your island’s actual size. If your island is small, hanging three pendants will overwhelm the space. Count your fixtures based on island length, not just what looks pretty in a photo.
Blocking sightlines happens when homeowners don’t test placement first. Your lights should never obstruct views across your kitchen or interfere with movement around the island. Walk around and check sight lines before making any permanent connections.
Mismatched fixture styles create visual chaos. All your pendant lights should coordinate in size, shape, and finish. Mixing styles without intention makes your kitchen look unplanned.
Poor positioning relative to the island edge causes another problem. Lights hung too far from the edge leave the counter edges dark. Position fixtures 6 to 12 inches from your island perimeter for proper coverage.
Finally, failing to turn off power before installation creates serious safety hazards. Always switch off electricity at the breaker before touching any wiring. Test the power with a voltage tester to confirm it’s off.
Taking time to plan your layout prevents these mistakes and ensures your pendant lights function beautifully and safely above your island.
Troubleshooting Common Installation Issues
When you’re installing pendant lights over your island, several issues commonly pop up during the process. Knowing how to fix them saves time and frustration.
Electrical connection problems often occur when wires don’t match properly. Your existing wiring might use different gauge sizes or connector types than your new fixtures require. Always turn off power at the breaker before touching any wires. If you’re unsure about wire compatibility, consult an electrician rather than forcing connections.
Height adjustment challenges happen frequently. You measure once, drill holes, then realize the pendants hang too low or too high. This is why test fitting matters before final installation. Hang your fixtures temporarily using adjustable chains or ropes to confirm the exact height feels right in your space.
Uneven spacing creates visual imbalance that’s hard to ignore once you notice it. Measure from the center of each fixture to ensure consistent distances. Use a laser level or chalk line to mark ceiling positions before drilling. Small spacing errors compound across multiple fixtures.
Ceiling damage occurs when you drill into the wrong spots or hit pipes and electrical lines hidden above. Always use a stud finder and check your ceiling carefully before drilling. If you hit something solid that isn’t a joist, stop immediately and relocate your holes.
Flickering or non functioning lights suggest wiring issues or incompatible dimmer switches. Test each fixture individually before blaming the installation. Loose connections at the breaker or switch often cause these problems.
Mounting bracket misalignment prevents fixtures from hanging straight. Double check that your bracket sits level before securing it permanently. Use a level tool on the bracket itself, not just your eye.
These troubleshooting steps help you identify and solve problems quickly, ensuring your pendant lights hang properly and function safely.
Final Thoughts
Hanging pendant lights over your island can transform your kitchen’s look. The process becomes simple once you follow the right steps. Measure your space, plan your height, and test before you commit.
Remember the key numbers. Hang pendants 30 to 36 inches above your countertop. Keep them 6 to 12 inches from the island edge. Space multiple fixtures 30 to 32 inches apart.
These measurements create balance. They also keep your lights functional and safe.
Safety always comes first. Turn off power before touching any wiring. Double check connections before you restore electricity.
Take time to test your layout. Stand at different points around your kitchen. Check if the pendants block your view or interfere with movement.
Small adjustments make a big difference. Moving a fixture two inches can fix a spacing problem. Raising or lowering a pendant slightly can solve a sightline issue.
Your ceiling height matters throughout this project. Tall ceilings allow longer cords or chains. Lower ceilings need compact fixtures that sit closer to the mounting point.
Consistency ties everything together. Matching styles, even spacing, and proper height create a cohesive look. Your island becomes a focal point instead of a problem area.
Don’t rush the installation process. Confirm your height and spacing before drilling any final holes. This simple step saves you from costly mistakes later.
Pendant lights do more than provide light. They add character to your kitchen. They highlight your island as a gathering spot for family and friends.
With careful planning, your pendant lights will look professional. They will function well and last for years. Take your time, follow these guidelines, and enjoy the results.
Your kitchen island deserves lighting that works as hard as it looks good.
Frequently Asked Questions
How far should pendant lights hang above my island?
Hang the bottom of your fixture 30 to 36 inches above your countertop surface. This distance gives you proper task lighting without blocking your view across the kitchen. If your ceiling feels low, you can adjust slightly lower. Always measure twice before drilling holes.
What spacing works best between multiple pendants?
Space your fixtures 30 to 32 inches apart from center to center. This creates visual balance and ensures even light coverage. For a smaller island, two pendants work well. Larger islands need three or more fixtures spaced evenly.
How far from the island edge should I position lights?
Keep fixtures 6 to 12 inches away from your island’s perimeter. This distance prevents lights from hanging too far over walkways. You want clear sightlines around the island so people can move safely through your kitchen.
Does my ceiling height affect pendant light installation?
Yes, ceiling height matters significantly. Standard ceilings around 8 to 9 feet work perfectly for 30 to 36 inch hanging heights. Higher ceilings give you more flexibility with cord length. Lower ceilings may require shorter chains or cords to maintain proper clearance and avoid bumping your head.
Should all my pendant lights match in style?
Using matching fixtures creates a cohesive look throughout your kitchen. Mismatched styles create visual confusion. Pick one design and stick with it. Consistency in color, material, and shape ties your island lighting together professionally.

DK is the founder and lead writer at Smart Lighting Finds, where he helps readers discover the best lighting products through honest, hands-on reviews and in-depth comparisons. With a deep passion for home improvement and smart technology, DK is dedicated to making every lighting decision easier and brighter for his readers.