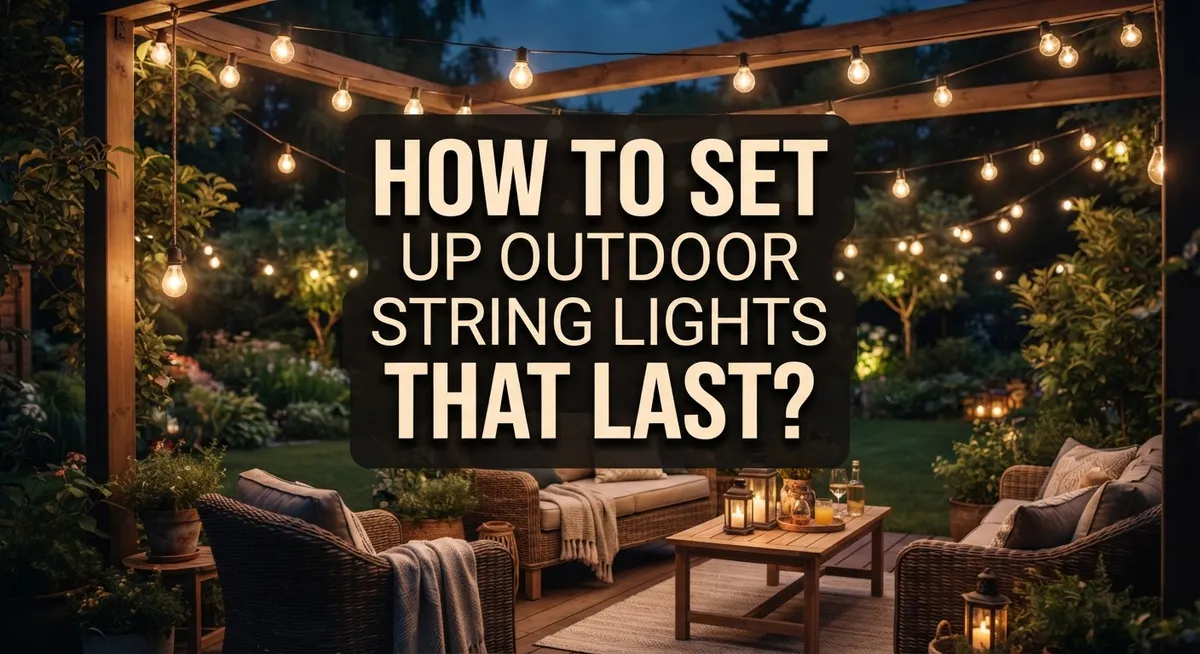
How to Set Up Outdoor String Lights That Last?
Outdoor string lights turn any backyard into a warm, glowing space. They make patios feel cozy and gardens feel magical. But many people hang them once and watch them sag, break, or fall within months.
The truth is, lasting string lights need more than a quick hookup. You need a plan, the right anchor points, and proper tension. Small details like these make a big difference.
This guide walks you through the entire process. You will learn how to measure your space and pick anchor points that hold strong. We will also cover how to install eye bolts, thread support wire, and attach your lights securely.
You will discover simple installation tips, like using zip ties or hooks to keep everything in place. We will also highlight common mistakes that cause lights to sag or fail early.
By the end, you will know how to create a beautiful, durable lighting setup. Whether you want lights across your patio, around a fence, or between trees, this article gives you the steps to do it right.
In a Nutshell
Here is a quick summary to help you set up outdoor string lights that stay put for years.
-
Measure first: Check the distance between your anchor points, like trees or walls. This helps you plan the right tension and avoid sagging later.
-
Build a strong support system: Install eye bolts or hooks at each anchor point. Thread a support wire between them to hold the weight of your lights.
-
Add gauge wires: Attach small 4 inch wires to the main support wire. These act as extra connectors for your string lights.
-
Plan your plug placement: Keep the male plug close to the outlet. This small step prevents strain on the cords and keeps things safe.
-
Secure every few feet: Use zip ties or hooks between each bulb. This keeps the lights from swaying in wind or drooping over time.
-
Choose your layout style: You can run lights across the center, around the perimeter, or between trees. Pick a pattern that matches your space and creates a uniform glow.
Follow these steps, and your lights will shine bright for many seasons ahead.
Planning Your Layout: Measuring Anchor Points and Tension
Before you hang a single light, spend time measuring and planning. This step saves you from mistakes and wasted effort later.
Start by identifying where your anchor points will be. These are trees, fence posts, walls, or other sturdy structures that will hold your lights. Walk around your space and mark these spots. Write down the distance between each point. Use a measuring tape to get accurate numbers. This matters because you need to know if your string light length will fit the space.
Tension is critical for long lasting lights. Lights that hang too loose will sag and collect water. Lights that stretch too tight will strain the connections and bulbs. You want a gentle curve, like a smile, not a straight line or a deep U shape.
Draw a quick sketch of your backyard on paper. Mark your anchor points and write the measurements between them. This visual guide helps you see the whole picture before installation begins. You might discover that a tree is too far away or that you need an extra anchor point.
Consider how you want your lights to look. Will they run across the center of your space? Around the edges? Between two trees? Each layout affects how you measure and plan. A perimeter pattern needs different measurements than lights strung between trees.
Think about where your outlet is located. Your male plug should reach the outlet without stretching across walkways. This keeps people safe and prevents tripping hazards.
Once you have your measurements and sketch, you are ready to prepare your anchor points. You will install eye bolts or hooks at each location. These hold the support wire that carries the weight of your lights. Proper measurement now means your lights will hang evenly and last through many seasons.
Choosing the Right Anchor Points and Support Structures
Your anchor points are the foundation of a long lasting outdoor string light system. Without solid support, your lights will sag, shift, and fail over time.
Start by identifying all possible anchor points in your space. Trees work well because they are sturdy and already in place. Walls, fences, pergolas, and deck posts also serve as excellent anchors. Choose points that are roughly the same height for a clean, even appearance.
Measure the distance between each anchor point carefully. Use a measuring tape and write down every measurement. This step prevents mistakes during installation. Add a few extra feet to your measurements to account for the sag you want in your lights. A gentle curve looks better than a tight line, and it reduces stress on your anchor points.
Check that your anchor points can actually support weight. A weak tree branch or damaged fence post will fail under tension. Test each point by pulling on it firmly. If it moves or feels unstable, choose a different location.
Install eye bolts or sturdy hooks at each anchor point. Drill small starter holes first to make installation easier. This prevents wood from splitting. For concrete or brick, use appropriate anchors rated for outdoor use. Make sure hooks and bolts are rated for the weight your lights will carry.
Consider your layout pattern before you start. Do you want lights running across the center of your space? Around the perimeter? Between trees in a zigzag pattern? Each layout requires different anchor points and measurements.
Thread a support wire between your anchor points. This main wire carries most of the weight, not your string lights. Attach smaller gauge wires to this support wire every few feet. Your string lights then connect to these smaller wires using zip ties or hooks.
Proper anchor points and support structures keep your lights secure through wind, rain, and seasonal changes. Take time to get this foundation right, and your outdoor lighting will last for years.
Step-by-Step Installation Guide
Now that your anchor points are ready, it’s time to move forward with the actual installation. This process involves connecting your support system and securing your string lights properly.
Start by threading your support wire between the eye bolts you installed. Make sure the wire is tight and level. Proper tension prevents sagging and keeps water from pooling on the lights. Pull the wire snug, but don’t over tighten it, as this can damage your anchor points.
Next, attach small 4 inch gauge wires to your main support wire. These shorter wires will hold your string lights in place. Space them evenly along the support wire. The distance between each gauge wire should match the spacing of your bulbs on the string.
Install your bulbs into the string light sockets before hanging them. This step is easier to do on the ground. Check that each bulb sits firmly in its socket. Make sure no bulbs are loose or damaged.
Position your male plug so it’s closest to your power outlet. This reduces the amount of cord running across your space. It also makes it safer and easier to disconnect when needed.
Now attach your string lights to the gauge wires. Use zip ties or removable hooks to secure the lights. Attach the string between each bulb for a secure hold. This prevents the lights from swaying too much in wind.
Work your way along the support wire, securing each section as you go. Step back occasionally to check that everything looks level and even. Make adjustments before moving to the next section.
Once all lights are attached, test them to ensure they work properly. Check for any loose connections or bulbs that don’t light up. Make repairs before you finish.
Securing Techniques for Long-Lasting Durability
Securing your outdoor string lights properly ensures they stay in place through wind, rain, and seasonal changes. The right securing techniques make all the difference between lights that last one season and lights that perform for years.
Zip ties are your best friend for this task. Thread them through the loops or attachment points on your string light wire, then wrap them around your support wire. Pull them snug but not so tight that you damage the wire. Leave a tiny bit of wiggle room so the lights can move slightly in the wind without tearing.
For areas where you need adjustability, removable adhesive hooks work well on smooth surfaces like railings or walls. Press them firmly into place and let the adhesive set for 24 hours before hanging anything on them. Check the weight limit on the package to ensure they’ll support your lights.
Create support at regular intervals between each bulb, especially on longer runs. This prevents sagging and stops water from pooling on the wire. If your lights run across a wide span, add extra support points in the middle rather than relying only on the ends.
On structures like pergolas or fences, secure the light wire directly to the frame using small hooks or cable clips. Space these about every 12 inches for stability. This method distributes weight evenly and prevents stress on any single point.
Test your security by gently tugging on different sections of the wire. Nothing should shift or move unexpectedly. If you find loose areas, add more securing points.
During winter months, check your lights periodically. Wind, ice, and temperature changes can loosen connections over time. A quick visual inspection every few weeks catches problems before they become serious issues.
Popular Layout Patterns for Different Spaces
Different spaces need different light patterns. The best layout depends on your yard size, shape, and what you want to highlight.
Center line patterns work great for rectangular yards. Run your string lights straight across the middle of your space. This creates a focal point and draws the eye forward. Measure from one end to the other carefully. This pattern suits patios, decks, and garden pathways well.
Perimeter layouts frame your entire outdoor area. Attach lights around the edges of your space using trees, fence posts, or structure corners as anchor points. This approach makes your yard feel enclosed and cozy. It works especially well for entertaining large groups since people can move freely in the center.
Tree to tree patterns create a canopy effect. String lights between multiple trees in a zigzag or web formation. This option works beautifully in wooded yards or spaces with several mature trees. The lights appear to float overhead, creating magical ambiance.
Wrapped patterns go around permanent structures like pergolas, gazebos, or deck railings. Spiral the lights around posts or run them horizontally along beams. This approach maximizes light coverage in smaller spaces.
For mixed layouts, combine two patterns. Run lights across your deck while also framing a seating area with perimeter lights. This gives you flexibility and visual interest.
Sketch your chosen pattern before installation. Mark your anchor points on the sketch. Measure each section separately and add 10 percent extra length for sagging. This prevents tension problems later.
Test your layout mentally by walking through your space. Imagine where people will sit and gather. Make sure lights illuminate these areas without creating harsh shadows. Adjust your pattern accordingly.
Your chosen layout should match your space’s unique shape and your entertainment needs.
Common Mistakes That Shorten String Light Lifespan
Poor tension measurement causes your lights to sag or pull too tight. When you measure the distance between anchor points, you need to account for how much the wire will stretch over time. Measure twice and add a little extra length for natural settling.
Inadequate support structure is a major problem. If your main support wire isn’t strong enough, it will eventually fail under the weight of the lights and weather exposure. Use heavy gauge wire rated for outdoor use. Space your anchor points close enough that the wire doesn’t sag between them.
Placing your male plug far from the outlet creates unnecessary tension on the connection. This puts stress on the cord and the plug itself, which can lead to electrical failures. Always position your plug closest to your power source. This reduces strain and makes it easier to disconnect safely.
Skipping intermediate support points between bulbs weakens your entire setup. On longer runs, the lights will droop and put pressure on end connections. Secure the light wire at regular intervals using zip ties or hooks. This distributes weight evenly along the support structure.
Using the wrong fastening materials shortens your light’s life significantly. Cheap zip ties become brittle in sunlight and snap easily. Poor quality hooks rust and corrode. Invest in UV resistant zip ties and stainless steel hardware designed for outdoor conditions.
Neglecting tension adjustments during installation causes problems later. Your support wire will naturally settle and shift slightly. Check tension after the first week and make minor adjustments. This prevents excessive sagging that stresses the light connections.
Failing to test your lights before final securing wastes time later. Install everything, plug in your lights, and verify they all work. This catches faulty bulbs or connection issues before you finish securing everything permanently.
Improper drainage around anchor points allows water to pool and corrode hardware. Make sure water can flow away from where your support wire connects to anchor points. This simple step prevents rust and extends the life of your entire system.
Troubleshooting Sagging, Loose, or Uneven Lights
When your outdoor string lights start to sag, look loose, or hang unevenly, you can fix them with a few simple adjustments. These problems usually happen because the support wire doesn’t have enough tension or the attachment points need repositioning.
Check your anchor points first. Walk along your string lights and look for spots where they dip lower than others. This tells you where the tension is weakest. Gently tug on the support wire at these spots to see how much give it has. A properly tensioned wire should feel snug but not overly tight.
Loosen the eye bolts or hooks at your anchor points slightly. You don’t need to remove them completely. Adjust them by turning counterclockwise just enough to create more tension in the wire. Retighten slowly and check the line as you go. This prevents over tightening, which can damage your installation.
Reposition any zip ties or fasteners that hold your string lights to the support wire. Lights that hang loose often slip down because their fasteners weren’t tight enough initially. Go through each attachment point and ensure every zip tie is snug against both the bulb wire and support wire.
Add extra support points if you still see sagging. Install additional eye bolts or hooks between your current anchor points. This creates more places to attach your string lights and distributes weight more evenly across the entire span.
Check that your male plug sits closest to your outlet. Tension pulling away from the outlet creates slack in other sections. Reposition your lights if needed so the plug end is nearest to power.
Test your adjustments by walking beneath the lights. They should form a gentle, even line from anchor point to anchor point. Make small tweaks as needed until you achieve the look you want.
Final Thoughts
Setting up outdoor string lights does not need to feel hard. With the right plan, your lights can stay bright and secure for years.
Measuring your space is the first step you should never skip. Take time to note the distance between your anchor points before you buy any materials.
A strong support system makes all the difference. Eye bolts, hooks, and a sturdy support wire carry the weight of your lights and keep them steady through wind and rain.
Tension matters more than most people think. Lights that are too tight can snap under stress. Lights that are too loose will sag and look messy over time.
Always test your string lights before you finish the installation. This simple step saves you from climbing back up later to fix a bulb that does not work.
Keep your male plug close to the outlet. This small detail protects the connection and keeps water away from the plug during storms.
Choose a layout that fits your yard and your style. A center pattern, a perimeter design, or a canopy between trees can all work well when planned with care.
Regular checks help your lights last through every season. Look for loose fasteners, sagging wires, or worn hooks every few months.
Fix small problems early before they turn into bigger ones. A quick adjustment now can save you time and effort later.
Outdoor string lights bring warmth and charm to any space. They turn a plain yard into a place where people want to gather.
With careful planning and simple upkeep, your lights can shine bright for many seasons. Take your time during setup, and your outdoor space will reward you with light that lasts.
Frequently Asked Questions
How do I measure the distance between anchor points correctly?
Start by identifying where you want to attach your lights. Use a measuring tape to find the exact distance between your anchor points like trees or posts. Write down your measurements on paper.
Add extra length to your measurement. This accounts for the sag you want in your lights. Most people add 10 to 15 percent extra to create a gentle curve. This prevents your lights from looking too tight or strained.
Sketch your layout on paper before you start. Mark where each anchor point sits and note the distances. This simple step saves time and prevents mistakes during installation.
What’s the best way to secure string lights to a support wire?
Thread a support wire between your eye bolts or hooks first. This wire carries the weight of your string lights, not the electrical cord. The electrical cord should hang loosely beneath the support wire.
Use zip ties to attach your string lights to the support wire. Space your zip ties evenly between each bulb. This keeps your lights from shifting or sagging over time.
For structures like railings, secure your lights between each bulb. This creates a uniform look and prevents drooping. Check your fasteners every few weeks to ensure they stay tight.
Where should I position the male plug on my string lights?
Place the male plug as close to your outlet as possible. This reduces tension on the electrical connection and prevents dangerous stretching. Long distances create strain that can damage your plug over time.
Run your cord along your support wire using small hooks or clips. Keep the cord away from areas where people walk. This protects both your lights and your guests from tripping hazards.
Can I leave outdoor string lights up year round?
Most string lights can stay outside during mild seasons. Winter weather, heavy snow, and ice create extra weight and stress. Remove your lights before harsh weather arrives in your area.
Check your lights monthly for damage or loose connections. Wind and temperature changes can loosen fasteners. Early repairs keep small problems from becoming expensive replacements.

DK is the founder and lead writer at Smart Lighting Finds, where he helps readers discover the best lighting products through honest, hands-on reviews and in-depth comparisons. With a deep passion for home improvement and smart technology, DK is dedicated to making every lighting decision easier and brighter for his readers.